
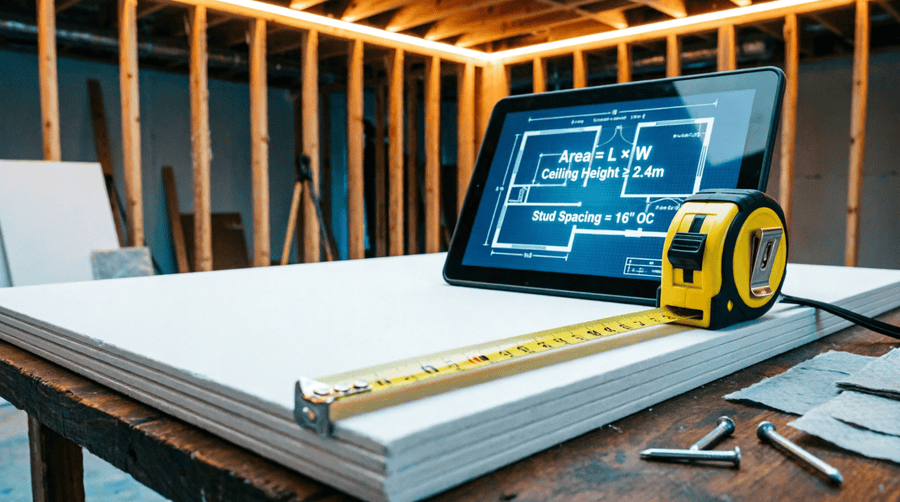
How to calculate how many sheets of drywall you need is the most important step before starting any renovation. If you’ve measured a basement and divided the square footage by 32, you’ve probably ended up with a number that feels a little too clean. A 500-square-foot room doesn’t need exactly 16 sheets of 4×8 drywall; it needs however many full sheets it actually takes to cover the walls and ceiling once cuts, corners, and layout are accounted for.
That gap between the “math answer” and the “order answer” is where most estimates go wrong. Square footage tells you the minimum coverage required. It doesn’t tell you how that coverage gets built from 4-foot-wide panels, where the seams land on each wall, or how much gets trimmed away cutting around a doorway. This guide walks through both parts: the calculation and the practical adjustments that turn a calculation into a number you can actually order.
How to measure a room for drywall
Start with a tape measure, a notepad (or your phone), and a simple sketch of the room from above. Record:
- Room length and width — for ceiling area and overall layout
- Wall height, floor to ceiling
- Individual wall lengths, especially if the room isn’t a simple rectangle
- Door width and height for every door opening
- Window width and height for every window
- Any other large openings — stair openings, mechanical chases, pass-throughs
- Ceiling dimensions, including any dropped sections or bulkheads
A rectangular room with two doors and one window is a five-minute job. A basement with a support column, a furnace bulkhead, a half-height knee wall, and an angled corner under the stairs is not, and trying to calculate that whole shape as one figure is where errors creep in.
The fix is simple: break the room into smaller rectangles. Treat the bulkhead as its own small box, the column enclosure as another, and each wall segment around the stairs as its own piece. Add the pieces together at the end. It takes a few extra minutes, and it’s far more accurate than eyeballing an irregular space as a single number.
Calculating wall and ceiling square footage
Once you have your measurements, the core formulas are straightforward.
Wall area = wall length × wall height (calculated per wall if lengths differ, then added together)
Ceiling area = room length × room width
Opening area = opening width × opening height
For a simple rectangular room, wall area is easiest to find using the perimeter: multiply the perimeter (the sum of all four wall lengths) by the ceiling height, rather than measuring each wall separately.
Should you subtract doors and windows?
This is worth slowing down on, because it’s the step where a lot of estimates go wrong in both directions.
Mathematically, subtracting an opening’s area gives you a smaller net square footage. But a standard interior door or a typical basement window isn’t big enough to actually eliminate a sheet from the wall; the cutout still comes from a full panel, and the offcut often gets used as filler somewhere else in the room. Subtracting small openings makes your square footage look lower without actually reducing how many sheets you need to buy, which is why professional estimators typically calculate sheet counts from gross wall and ceiling area rather than net area, and add a waste allowance on top instead of subtracting openings out.
Large openings are a different story. A wide window wall, a garage door opening, an open stairwell, or any gap wide enough to remove an entire section of a wall from the layout will genuinely reduce the number of sheets needed, and should be subtracted.
Openings do matter for a separate calculation, though: joint compound and tape are only needed where drywall actually exists. For that part of the estimate, using the net area (gross area minus openings) makes more sense, since there’s no seam to finish inside a doorway.
How to calculate how many sheets of drywall I need
The basic formula is:
Sheet coverage = sheet length × sheet width
Minimum theoretical sheet count = gross wall and ceiling area ÷ sheet coverage, rounded up
This number is a genuine floor, the least amount of material that could cover the surface if every sheet were used with zero waste. It is not the order quantity, for two reasons. First, sheets have to be laid out across specific wall lengths and ceiling dimensions, and real walls rarely divide evenly into 4-foot or 8-foot increments; the actual layout can require more panels than the pure area math suggests, even before any waste is added. Second, cutting, damaged pieces, and the room’s shape all add to what you’ll use beyond the theoretical minimum.
So there are really three numbers in play:
- Minimum theoretical count — gross area ÷ sheet coverage, rounded up
- Layout-based count — what a wall-by-wall sheet layout actually requires, which can be higher than the theoretical minimum depending on wall lengths and seam placement
- Final order quantity — the layout-based count plus a waste allowance for cutting, corners, and the unexpected
Without drawing the specific layout for a specific wall, the second number can’t be stated precisely; it depends on exactly how the panels fall across each wall. What can be said reliably is that the layout-based count is typically equal to or slightly higher than the theoretical minimum, never lower.
4×8 vs. 4×12 drywall sheets
Both sheet sizes are manufactured at a standard 4-foot width, with length being the variable dimension.
4×8 sheet: 4 ft × 8 ft = 32 square feet of coverage. This is the sheet you’ll find at every hardware store and lumberyard, and it’s manageable for one person to carry and install.
4×12 sheet: 4 ft × 12 ft = 48 square feet of coverage. Fewer sheets are needed to cover the same wall, which means fewer seams to tape and finish, a real advantage on long, uninterrupted walls or taller ceilings.
Longer sheets aren’t automatically the better choice. A 12-foot panel is heavier and awkward for one person to handle safely, and it doesn’t always fit through a standard doorway or down a narrow basement stairwell. Fewer sheets also doesn’t guarantee lower total cost; 4×12 panels often cost more per square foot, and the reduced seam count has to be weighed against handling difficulty. For a basement reached through a normal stairwell, that access question is often the deciding factor before cost or seam count even comes into play.
A worked example
The following is a hypothetical example built to illustrate the calculation, not a real project.
Assumed room: a rectangular basement space, 14 ft long × 12 ft wide, with an 8-ft ceiling height. The room has one standard interior door (assumed 3 ft × 6 ft 8 in, i.e., 3 ft × 6.67 ft) and one window (assumed 3 ft × 4 ft).
Wall area:
Perimeter = 2 × (14 + 12) = 52 ft
Wall area = 52 ft × 8 ft = 416 sq ft
Ceiling area: 14 ft × 12 ft = 168 sq ft
Gross area (walls + ceiling): 416 + 168 = 584 sq ft
Openings (for reference):
Door: 3 ft × 6.67 ft = 20.0 sq ft
Window: 3 ft × 4 ft = 12.0 sq ft
Total openings = 32 sq ft
Net area (gross minus openings): 584 − 32 = 552 sq ft — this figure is used later for joint compound and tape, not for sheet count.
Minimum theoretical sheet count, 4×8 (32 sq ft/sheet):
584 ÷ 32 = 18.25 → 19 sheets
Minimum theoretical sheet count, 4×12 (48 sq ft/sheet):
584 ÷ 48 = 12.17 → 13 sheets
These are floor numbers based on gross area; the door and window aren’t subtracted, since neither is large enough to remove a sheet from the actual wall layout. The real layout for this specific room, wall by wall, could land at this number or slightly above it depending on where the seams fall; without laying out each wall individually, treat 19 sheets (4×8) or 13 sheets (4×12) as the starting point, not the guaranteed final count.
Applying a waste allowance: This room is a simple rectangle with only one door, one window, and no unusual angles or bulkheads, so 10% is used here as an example. This percentage is a hypothetical estimating allowance for this specific example, not an industry standard, not a mathematical requirement, and not a number that applies uniformly to every drywall job. A room with more corners, more openings, or an irregular shape would justify a higher allowance.
584 sq ft × 1.10 = 642.4 sq ft
642.4 ÷ 32 = 20.08 → 21 sheets of 4×8 (practical order quantity for this example)
642.4 ÷ 48 = 13.38 → 14 sheets of 4×12 (practical order quantity for this example)
Drywall waste factor: why there’s no universal number
Waste on a drywall job comes from cutting around openings, trimming at corners, matching irregular sections, and the occasional damaged or miscut sheet. How much you’ll see depends on:
- How many corners and small sections the room has
- Number and size of openings
- Sheet size chosen
- Wall height relative to sheet length
- Installer experience with layout planning
There is no single percentage that fits every project, and no authoritative source sets one universal figure; it depends too heavily on the specific room. Treat any percentage, including the 10% used above, as a starting allowance to sanity-check your order. On a real bid, the more reliable method is sketching the actual sheet layout on each wall and counting cuts directly, which is what experienced estimators do instead of applying a flat percentage.
How much joint compound do you need?
Joint compound coverage is a separate calculation from sheet count, and manufacturer coverage figures apply to a specific product and a specific application; they don’t translate directly into a universal rule for every job or every compound.
USG’s technical data for its premixed all-purpose joint compound lists coverage of approximately 9.4 gallons per 1,000 square feet of gypsum panel. That figure describes a single coat/application of that specific product used to embed tape and finish joints; it is not a total for a complete multi-coat job, and a different product (setting-type compound, lightweight compound, a different manufacturer) will carry a different figure.
A standard finish typically involves multiple coats: an embedding coat, a fill coat, and a finish coat, and coats after the first are usually thinner and more localized rather than covering the full surface again, so the total for a full job isn’t a simple multiple of the single-coat figure. Rather than guessing at a multi-coat total, a practical shortcut commonly used for planning is to budget roughly one 5-gallon bucket of all-purpose compound for every 8 to 10 sheets of drywall hung, covering the tape coat plus fill and finish coats together.
Applied to this example’s 19–21 sheets: 19 ÷ 10 = 1.9 and 21 ÷ 8 = 2.6, so a reasonable planning range is 2 to 3 five-gallon buckets; call it 3 buckets (about 15 gallons) to leave a margin for touch-ups after sanding. This is a planning allowance, not a manufacturer specification, and actual usage will vary with technique, joint tightness, and how much sanding and rework the job involves.
How to estimate drywall tape
Tape quantity tracks the total length of joints, not the square footage directly. A room built from more, shorter sheets has more joints per square foot than one covered with fewer, longer sheets.
A commonly used estimating guideline is that drywall tape covers roughly 2 to 3 square feet of drywall surface per linear foot of tape. Applied to this example’s 552 sq ft of net (finished) surface:
At 2 sq ft per foot: 552 ÷ 2 = 276 linear feet
At 3 sq ft per foot: 552 ÷ 3 = 184 linear feet
So the estimated range is roughly 184 to 276 linear feet of tape for this room. Standard paper joint tape is commonly sold in 250-foot rolls. Since the top of that range exceeds one roll, and corners plus any repairs consume extra, plan on 2 rolls rather than cutting it close with one. As with joint compound, this is a general approximation; actual tape use depends on the specific sheet layout, the number of seams and corners, and the sheet size chosen (a 4×12 layout with fewer seams will typically use less tape than a 4×8 layout on the same room).
Common estimating mistakes
A few patterns show up repeatedly in rough estimates:
- Dividing total square footage by 32 and stopping there, without checking how sheets actually lay across each wall
- Subtracting every door and window from the sheet count, which understates the order for openings too small to change the physical layout
- Applying a flat waste percentage without considering room shape, when a complex basement layout may need more than a simple rectangle
- Treating joint compound and tape as an afterthought, rather than a separate calculation tied to the finished surface area
- Choosing 4×12 sheets for coverage alone, without checking whether they’ll physically get through the door and down the stairs
Using a calculator for the rest of your project
Working through wall area, ceiling area, and sheet count by hand is manageable for a single room, and it’s worth doing at least once so you understand where the numbers come from. If your basement project also involves other materials a concrete patch for the floor, or gravel for drainage work around the foundation — TheCalcYard’s full set of calculators covers those adjacent estimates too, so you’re not tracking separate spreadsheets for each part of the job.
Putting it together
For a room like the one in this example, the honest answer isn’t a single clean number, it’s a range that narrows as you move through the calculation: a minimum theoretical count from gross square footage (19 sheets of 4×8), a layout-based count that may run at or slightly above that minimum depending on the specific walls, and a final practical order (21 sheets, in this example) once a reasonable waste allowance is added. Measure carefully, break complicated spaces into rectangles, calculate joint compound and tape as their own line items, and round up at every step; a few extra dollars in material is far cheaper than a second trip to the supplier mid-job.