
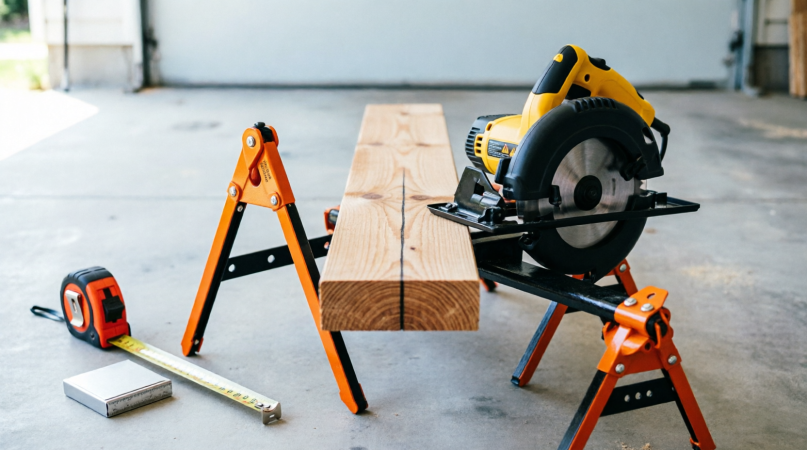
At its core, a saw sawhorse setup is a sturdy, freestanding frame designed to hold lumber, boards, or panels at a comfortable working height. Whether you are cutting, drilling, sanding, or assembling, this essential workshop staple acts as a support system, not a cutting tool itself. For safety and stability, sawhorses are almost always used in pairs. While most fixed-height models sit between 30 and 34 inches tall, there is no universal standard; the ideal height depends entirely on your body mechanics and the specific task at hand.
If you are here specifically to learn how to use a sawhorse with a circular saw, feel free to jump straight to the safe-cutting section below. Otherwise, this comprehensive guide covers everything from the different types of sawhorses and how to size them, to building your own and knowing what to use when you don’t have one on hand.
What You Will Learn in This Guide:
- What a sawhorse is actually used for
- The different types of sawhorses available
- How to choose the right sawhorse for your needs
- Sawhorse height, leg angles, and structural basics
- Step-by-step instructions on how to make a basic wooden sawhorse
- Best practices for using a sawhorse to cut wood safely
- Essential sawhorse accessories, brackets, and miter saw support
- Log sawhorses and chainsaw safety
- Common mistakes to avoid and practical alternatives
What Is a Sawhorse Used For?
The primary purpose of a sawhorse is to elevate your materials off the ground, preventing you from having to bend over excessively or accidentally cut into your floor or dirt. Common applications include:
- Supporting dimensional lumber: Holding 2x4s, 2x6s, trim, or decking securely during crosscuts and rip cuts.
- Breaking down sheet goods: Supporting plywood or OSB panels, often requiring extra rails to prevent sagging.
- Acting as a temporary workbench: Laying a sheet of plywood or a few 2x lumber rails across a pair to create a makeshift table.
- Holding large components: Elevating doors, cabinets, or furniture parts for sanding, painting, or finishing.
- Tool platforms: Serving as a base for tools, such as a miter saw, provided the support is sturdy and properly rated.
While a single sawhorse might suffice for short, manageable pieces, longer boards absolutely require two supports, spaced appropriately to prevent the material from tipping or sagging dangerously between them.
What Are the Different Types of Sawhorses?
No single design is perfect for every scenario. Your best choice depends on your workflow. Here is a breakdown of the most common types:
| Type | Main Characteristics | Best-Suited Tasks | Advantages | Limitations |
|---|---|---|---|---|
| Wooden (Homemade or Bracket-Built) | Lumber top beam and legs, often joined with metal brackets. | Shop work, general cutting, custom sizing. | Inexpensive, easily repairable, built to your exact height. | Bulky, hard to store, strength depends heavily on build quality. |
| Folding Steel | Tubular or stamped steel legs that fold flat. | Jobsites, home projects, moving between work areas. | Fast setup, compact storage, often high manufacturer weight ratings. | Height is usually fixed; capacity may be rated per pair, not per unit. |
| Adjustable Height | Telescoping or locking legs. | Mixed tasks, working at varying heights. | One pair covers several different jobs. | More moving parts to inspect; locks must be fully engaged. |
| Plastic or Composite | Molded body, often folding. | Light cutting, painting, household projects. | Lightweight, will not rust. | Ratings vary widely; always confirm capacity before heavy use. |
| Heavy-Duty | Thicker steel or reinforced construction. | Heavy lumber, tool platforms. | Higher manufacturer weight ratings. | Heavier and more expensive. |
| Sawbuck (Log Sawhorse) | X-shaped ends forming a V-shaped cradle. | Holding logs and firewood rounds. | Keeps round stock from rolling. | Not meant for sheet goods or finish carpentry. |
| Miter Saw Stand | Folding stand with saw mounting points and material supports. | Crosscutting trim and lumber with a miter saw. | Matches saw-table height, supports long stock. | Built for a specific tool, not a general work support. |
Retailer and manufacturer listings show a wide range of options. For instance, brands like Sawhorse ToughBuilt offer folding sawhorse and jobsite table two-packs (such as models TB-C300-2 and TB-C700-2). Always check the current manufacturer page for each model’s rated capacity and dimensions before buying, as specifications differ. Another niche option you might encounter is the pack horse sawhorse, a specialized, highly portable system designed for backpacking or remote trail work, though it is less common in standard home workshops.
How to Choose the Right Sawhorse
Start by identifying what you will cut most often, then verify the details that directly impact safety and fit.
- Occasional DIY cutting: Look for stable folding legs and a top that accepts 2×4 rails or a sacrificial board. Verify whether the weight rating is per sawhorse or per pair, and ensure the legs lock fully.
- Breaking down plywood or OSB: You will need a pair or trio of supports with a wide top or rails. Verify that the setup keeps the panel from sagging and closing the kerf.
- Regular jobsite use: Prioritize compact folding, a rated capacity well above your typical loads, and non-slip feet. Consider the weight of each unit and how it handles uneven ground.
- Fixed shop use: A wooden or steel build at your preferred height is ideal. Check the height, bracing, and ensure the top is flat and replaceable.
- Supporting a miter saw: Use a stand or rated platform with proper mounting points. Always follow the saw manufacturer’s mounting instructions and the stand’s rated load.
- Cutting logs: Choose a sawbuck sized for your logs and your saw. Ensure it is explicitly designed for chainsaw use.
Portability and storage matter more than most people realize. A folding model that takes 10 seconds to set up will actually get used for small cuts, whereas a heavy wooden pair might stay tucked in the garage, inviting unsafe shortcuts like cutting on the floor.
Sawhorse Height, Leg Angle, and Structure
There is no single correct sawhorse height or leg angle. Commercial fixed sawhorses commonly fall around 30 to 34 inches, while adjustable models cover roughly 24 to 36 inches or more. For leg angles, published saw horse plans typically use angles in the range of 15 to 20 degrees from vertical, but these are design choices, not strict rules.
What a sawhorse structure is made of:
A basic sawhorse has four main components:
- Top beam: The horizontal member carrying the work. Many plans use a 2×4 or larger board on edge. Sawhorse brackets are widely available and accept 2×4 through 2×12 tops.
- Legs: Usually four, angled outward so the base is wider than the top for stability.
- Bracing or gussets: Cross braces, plywood gussets, or a crossbar that keep the legs from racking (skewing sideways).
- Feet: Cut flat to the floor, or fitted with non-slip pads on manufactured models.
Choosing a working height:
Two simple rules of thumb are widely used. One is to set the top at roughly your wrist-crease height with your arms hanging naturally. Another is to set the top slightly below standing elbow height (e.g., elbow height minus 2 inches). Remember that laying a board or panel on top adds to your working height, so subtract that thickness. For example, a person with a 42-inch standing elbow height using a 1.5-inch-thick board would set the sawhorse itself to about 38.5 inches to achieve a 40-inch working surface.
Leg angle: define it before you use it
Leg angle is easy to misread, so let’s clarify the terms:
- Splay angle: How far a leg leans from vertical, viewed from the end of the sawhorse.
- Bevel angle: The tilt of the saw blade when you cut the leg ends. If a leg’s top and bottom are cut parallel so both sit flat, the bevel setting equals the splay angle, but they are different concepts. Splay describes the leg; bevel describes the saw setting.
A larger splay angle gives a wider, more stable stance but requires longer legs for the same height and a wider floor footprint.
Calculating leg length for your own design:
If you draw your own design, this geometric relationship gives the leg length along its centerline:
Leg length = vertical leg height ÷ cos(splay angle)
Assuming a 32-inch finished height, a 1.5-inch-thick top member, and leg tops/bottoms cut parallel:
- Vertical leg height = 32 in − 1.5 in = 30.5 in
- At a 15-degree splay angle: Leg centerline length is about 31.58 in.
- At a 20-degree splay angle: Leg centerline length is about 32.46 in.
Note: This is a geometry example, not an engineered design, and it says nothing about joint strength.
Why bracing and level assembly matter:
Splayed legs resist tipping, and bracing resists racking. A sawhorse that wobbles or rocks transfers that motion directly into your cut, leading to inaccurate or dangerous results. Legs of unequal length, loose joints, or an uneven floor are the usual culprits.
How to Make a Basic Wooden Sawhorse
Building a wooden sawhorse is a highly rewarding first project, and the simplest, most dependable route uses metal brackets. Bracket sets are sold specifically for this purpose, and their instructions include cut charts, removing all the geometry guesswork.
Tools and Materials:
- Lumber for the top beam and four legs (2x4s are common for legs)
- A sawhorse brackets set (one set makes one sawhorse)
- Circular saw or miter saw, tape measure, speed square, drill, and level
- Fasteners as specified in the bracket instructions
Steps:
- Decide the finished height using the wrist-crease or elbow rules mentioned above.
- Cut the top beam to length. Many plans use roughly 36 to 48 inches; a longer top provides more room for your material.
- Cut the legs to the length listed in your bracket maker’s chart. For example, an instruction sheet for a popular bracket set lists leg lengths for a 2×4 top: 29-1/2 inches for a 30-inch sawhorse and 35-7/8 inches for a 36-inch one. Always use the chart that came with your specific brackets.
- Assemble following the instructions. For added stability, many makers offer an optional crossbar placed about 12 inches below the bracket.
- Check for level. Stand the sawhorse on a flat floor and ensure all four feet touch. Press down on each corner. If it rocks, find the longest legs and trim them slightly, then repeat.
- Inspect before loading. Look for cracks, loose fasteners, and splits near joints.
If you prefer a no-bracket design with notches and gussets, searching for free Sawhorse Plans PDF or web-based guides can yield great results. For instance, some plans recommend setting the saw to a 15-degree bevel for the legs and using pressure-treated lumber for outdoor durability. When driving screws into a top you plan to cut across, set them deep enough that a saw blade will not strike them.
To buy lumber efficiently and avoid overpaying, using a board foot calculator helps you price boards accurately by their actual dimensions.
Note on load capacity: A homemade sawhorse has no universal capacity. It depends on the lumber’s condition, dimensions, joints, fasteners, and bracing. Manufacturer ratings apply only to those specific manufactured products. Always check whether a rating is per sawhorse or per pair.
How to Use a Sawhorse With a Circular Saw
Supporting the board on stable, level supports so it cannot shift, sag, or pinch the blade is the golden rule. Secure the workpiece when appropriate, set the blade just deeper than the material, keep both hands on the saw, and always follow your saw’s manual. Circular saw manuals heavily emphasize supporting the workpiece properly to limit blade binding and loss of control, warning that kickback is a sudden, violent reaction to a pinched, jammed, or misaligned blade.
Cutting Dimensional Lumber:
- Inspect first. Check the sawhorses for cracks and loose legs, the blade for damage, and the saw’s guard and cord/battery. A dull blade increases friction and binding risk.
- Set up on a level surface. Place the sawhorses so the board rests on both, with the cut line in a comfortable reach. Keep the saw’s base plate on solid, supported wood.
- Plan the cut to keep the kerf open. The kerf is the slot the blade removes. If the board sags or the offcut drops early, the slot closes and pinches the blade. Position supports so the blade does not touch them and the cut piece can fall away freely.
- Secure the workpiece. Clamp it when practical, keeping clamps out of the blade’s path. Never hold unstable material by hand near the blade.
- Set blade depth. Adjust the cutting depth to the workpiece thickness, so only a small portion of the teeth shows below the board.
- Position yourself. Stand to the side of the cut line, not directly behind the saw. Wear eye and hearing protection.
- Make the cut. Hold the saw firmly, let the blade reach full speed before touching the wood, and let the saw cut without forcing it. If it binds, release the trigger, hold the saw steady, and find the cause.
- Finish safely. Release the trigger and let the blade stop before lifting the saw. Disconnect power before adjusting depth or changing the blade.
Cutting Plywood, OSB, and Sheet Goods:
Sheet goods sag under their own weight, and the cuts are often long. Support the panel near the cut and near its edge.
- Lay the sheet across several supports so no section hangs unsupported, setting the cut line over the gap, not over a support.
- Use sacrificial strips (like 2×4 lumber on edge) or rigid foam insulation on top of the sawhorses. If using foam, set the blade depth to cut through the sheet and just score the foam.
- Use a third support for large or floppy sheets.
Never improvise an unsafe platform, remove the blade guard, or assume that laying any board loosely across two sawhorses is safe for every cut.
Sawhorse Accessories, Brackets, and Miter Saw Support
- Brackets: Metal or plastic pieces that let you build a sawhorse from standard sawhorse wood. Check which lumber sizes the set accepts.
- Rail slots and 2×4 supports: Many folding models have slots that take 2×4 rails, turning a pair into a work table.
- Clamps: Quick-grip bar clamps work exceptionally well for securing workpieces.
- Sacrificial tops: A replaceable board on the sawhorse protects the frame and gives the blade a safe exit path.
- Material supports: Adjustable arms or rails help with long stock.
For a miter saw, use a purpose-built stand or a platform rated for the saw’s weight. A DIY sawhorse miter saw stand built from two sawhorses and a plywood top can work brilliantly, but it must be stable, level, and rated for the load. Treat it as an engineered platform, not a quick stack.
Log Sawhorses and Chainsaws
A sawbuck is a specialized sawhorse with X-shaped ends that cradle round logs for cutting. It is the standard solution for firewood preparation, as logs will simply roll off a flat top. If you are working out firewood volume for your projects, our guide on how much wood is in a cord provides the exact measurements you need.
Chainsaw work is a different safety category entirely. A chain can strike the ground right after it exits the log, which is why designs specific to chainsaws exist. Woodworking safety sources strongly warn against using a small, lightweight sawbuck for chainsaw work; the base must be heavy enough that kickback cannot tip it over. Always use a chainsaw saw horse designed and rated for that specific use, follow your chainsaw’s manual, and wear the specified protective gear.
Common Sawhorse Mistakes to Avoid
- Using one sawhorse for a long board: It will tip or sag. Use a pair, and a third support for long or flexible pieces.
- Cutting over a support: The blade can hit the sawhorse and kick back. Keep the blade path clear.
- Letting the kerf close: Poor support lets the cut pinch the blade.
- Setting blade depth too deep: Extra blade exposure raises the risk of injury without improving the cut.
- Trusting a misread rating: Per-pair and per-sawhorse ratings are vastly different numbers.
- Working on uneven ground: A rocking sawhorse ruins the cut. Level it or shim it.
- Skipping inspection: Check for cracks, loose joints, and unlocked legs before every session.
What Can You Use Instead of a Sawhorse?
If you find yourself without one, use anything that is stable, level, strong enough for the load, and lets you keep the blade clear:
- A workbench or sturdy table with a sacrificial board on top.
- Two stacks of lumber or concrete blocks that cannot shift, with a sacrificial board on top (secure the stack so it cannot topple).
- A sheet of rigid foam on a flat, solid surface for panel cuts.
- A purpose-made panel-cutting stand or folding work table.
Avoid chairs, ladders, and unstable stacks. Anything that can move under the saw is a severe hazard.
Frequently Asked Questions
What is another name for a sawhorse?
Common alternatives include sawbuck, saw stool, and saw trestle. “Sawbuck” is most often used for the X-ended type designed to hold logs.
Why is it called a sawhorse?
The name combines “saw” with “horse,” using the older definition of “horse” as a frame that something is propped on (like a clotheshorse). The word has been recorded in English since the late 1700s. “Sawbuck” comes from “buck,” derived from a Dutch word for trestle, attested by 1837. (Fun fact: The American slang “sawbuck” for a ten-dollar bill came from the Roman numeral X on old banknotes, which resembled a sawhorse end).
What is the standard height of a sawhorse?
There is no universal standard. Fixed commercial models commonly run about 30 to 34 inches, and adjustable ones span roughly 24 to 36 inches or more. Choose a height that lets your arms stay slightly bent without hunching.
What is the angle of a sawhorse?
There is no single mandated angle. Leg splay is typically in the range of 15 to 20 degrees from vertical in published plans. It is best to pick an angle from a proven plan or bracket instructions.
What can I use instead of a sawhorse?
A stable workbench, a sturdy table with a sacrificial top, or a purpose-built panel-cutting stand. (See the alternatives section above for more details).
Which sawhorse is best for my project?
It depends entirely on the task. Occasional DIY cutting suits a folding pair, shop work suits a wooden or heavy-duty set, firewood suits a sawbuck, and a miter saw needs a rated stand. Always check capacity, height, and stability for your specific use.
What is saw horse formula?
In woodworking, there is no standard “saw horse formula.” However, the term sawhorse representation or “sawhorse projection” is a well-known concept in organic chemistry, where it names a specific way of drawing the bonds between two adjacent carbon atoms in a molecule. It is entirely unrelated to the wooden support frame and falls outside the scope of this woodworking guide.
How to use a sawhorse to cut wood?
Support the wood on stable, level sawhorses so it cannot shift or sag. Plan the cut so the offcut can fall away without pinching the blade (the kerf). Secure the wood with clamps, set the circular saw blade depth to just slightly deeper than the wood’s thickness, and always keep your hands and body clear of the cutting path.
Conclusion
A sawhorse is only as good as the match between the frame, the material, and the cut. Pick a height that suits your body, confirm the manufacturer’s rating (and whether it is per sawhorse or per pair), and keep the support stable and the blade path clear. For circular saw work, the manual for your specific saw is the final word on supporting the workpiece, setting depth, and handling kickback. Stay safe, measure twice, and build with confidence.