
How Do You Install a Bathtub Faucet?
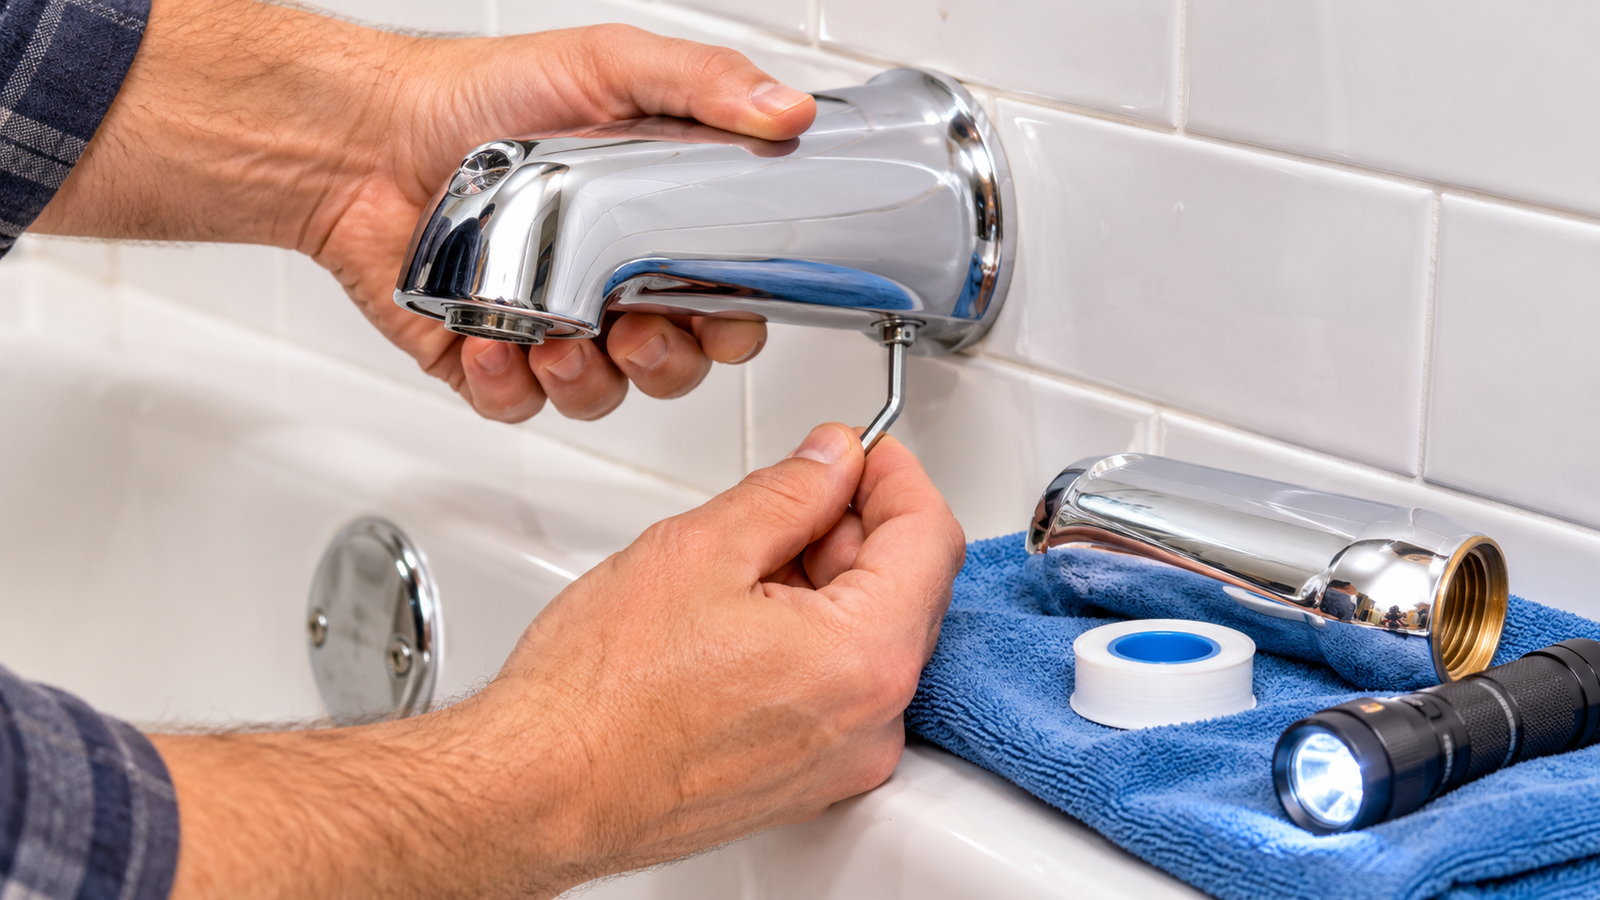
When you figure out how to install a bathtub faucet, the very first step is pinpointing exactly what part you are swapping out. You need to match the new piece to the old connection. Turn off the water, take out the old fixture, and put in the replacement based on its specific design. If you have a slip-on spout, it glides right over a smooth copper pipe and locks down with a set screw. A threaded spout, on the other hand, screws directly onto a threaded pipe. Swapping a handle just means attaching it to your current valve. But if you are replacing the entire tub and shower valve, you are looking at a major plumbing job inside the wall. Once everything is in place, turn the water back on slowly and keep a close eye out for leaks.
The word “faucet” actually covers three totally different jobs. Mixing them up is the easiest way to turn a quick fix into a flooded bathroom:
- Swapping out a tub spout is usually a quick 30 to 60 minute task that just needs a hex key or a pipe wrench. Most DIYers can handle this easily.
- Changing a handle or trim is also pretty straightforward, as long as the new parts actually fit your current valve.
- Replacing the valve itself means messing with supply lines, often hidden behind the wall. This might require soldering, PEX connections, permits, and a licensed plumber.
This guide breaks down all three scenarios so you can find the exact match for your tub. We will walk you through how to spot the differences, what tools to grab, how to pull out the old fixture, how to put in the new one, and how to test your work. We will also cover troubleshooting, common blunders, current pricing, and when it is time to call in a pro.
Know What You Are Replacing: Bathtub Faucet Terms
Before you head to the hardware store, you need to get the terminology down. A lot of product listings and store shelves throw around the term “bathtub faucet” pretty loosely.
| Term | What it is |
|---|---|
| Tub spout | The actual fixture where water pours into the tub. It might also have a diverter to push water up to the shower. |
| Handle (and trim) | The part you turn or push to control the water. The trim includes the handle itself plus the cover plate behind it. |
| Valve (mixing valve) | The hidden device inside the wall that mixes hot and cold water. It holds the cartridge or stem. |
| Cartridge | The internal piece inside many single-handle valves that manages flow and temperature. |
| Diverter | The mechanism that switches water flow from the tub spout up to the showerhead. It can be in the spout, a handle, or a separate valve. |
| Rough-in | The plumbing pipes installed inside the wall or floor before the visible fixtures go on. |
| Trim kit | The visible fixtures (handle, plate, spout) that finish off a valve. These are highly specific to the brand and model. |
The main thing to take away here: if your faucet is leaking right at the spout, the spout or its diverter is probably to blame. But if water drips after you turn it off, or the handle just will not regulate the temperature right, you are likely looking at a bad cartridge or valve.
Types of Bathtub Faucets and How They Install
How you install everything depends entirely on the faucet type and its connection to your plumbing.
| Faucet type | How it installs | Main consideration |
|---|---|---|
| Slip-on spout | Glides over a smooth copper pipe and locks with a set screw. | Pipe diameter, how far the pipe sticks out, and the copper’s condition. |
| Threaded spout | Screws directly onto a threaded pipe stub or fitting. | Thread size and type, plus the sealing method. |
| Tub and shower valve assembly | Connects to hot and cold supply lines, with outlets to the spout and showerhead. | Valve compatibility, wall access, and your plumbing skills. |
| Deck-mounted faucet | Mounts through holes in the tub deck or surround, with supply connections below. | Hole count and spacing, plus access under the deck. |
| Wall-mounted tub filler | Mounts through the wall right above the tub. | Rough-in position and concealed connections. |
| Freestanding tub filler | Stands on the floor next to a freestanding tub or mounts directly to the floor. | Floor rough-in, secure mounting, and concealed supply lines. |
Slip-On Bathtub Spouts
A slip-on spout glides right over a smooth copper pipe that sticks out of your wall. Take a look underneath the spout, close to the wall, and look for a tiny hole holding a set screw. If you spot one, you have a slip-on spout. That set screw clamps the spout tight against the pipe, while an internal seal stops water from escaping. These models are built for nominal 1/2 inch copper tubing. One supplier points out that the pipe needs to stick out roughly 1 inch to 2-7/8 inches from the wall, depending on the exact spout. Another plumbing supplier says the pipe projection for slip-on spouts should sit around 1 inch minimum and 2-7/8 inches maximum, depending on the model. Treat that range as your baseline, but always defer to the instructions for the specific spout you bought.
Threaded Bathtub Spouts
A threaded spout does not have a set screw. Instead, it screws directly onto a threaded pipe nipple or a threaded fitting. To take it off, you turn it counterclockwise. Thread sizes and styles can vary, so your new spout has to match the existing connection perfectly. Some threaded spouts connect at the front of the pipe, some at the wall end, and others are telescoping, which gives you a bit more wiggle room for the pipe length.
There is a third, much less common type: a spout that is soldered directly onto a copper stub. It has no set screw and will not unscrew. Swapping one out usually means cutting the pipe and converting the setup to a slip-on or threaded style.
Tub and Shower Faucet Assemblies
An assembly includes a mixing valve hidden inside the wall, a handle (or two), a trim plate, a tub spout, and often a showerhead. Single-handle versions use one valve with a cartridge. Two-handle versions have separate hot and cold stems. Installing a complete assembly is a totally different beast from just swapping a spout. It involves the water supply, and sometimes the wall itself.
Deck-Mounted, Wall-Mounted, and Freestanding Faucets
Deck-mounted faucets install through holes in the tub deck or surrounding platform, with the supply connections hiding underneath. Hole count and spacing change depending on the model, so the faucet has to match the holes your tub already has. Wall-mounted tub fillers need rough-in plumbing positioned correctly behind the wall. Freestanding faucets are floor-mounted or stand right beside the tub, meaning they need supply lines routed through the floor. These three styles are not interchangeable with each other or with a standard wall spout, and the rough-in dimensions are highly model-specific. If the plumbing is not already there in the right spot, this project usually turns into a plumber’s job.
Tools and Materials You May Need
You will not need every single item on this list for every job. Here is a breakdown of what applies to which project.
| Item | Used for |
|---|---|
| Allen (hex) keys | Set screws on slip-on spouts and many handles |
| Screwdrivers (Phillips and flathead) | Handle screws, trim plates, small covers |
| Adjustable wrench | Threaded connections and some fittings |
| Pipe wrench or strap wrench | Removing threaded spouts; a strap wrench protects the finish |
| PTFE (plumber’s) tape | Sealing tapered pipe threads, only where appropriate |
| Replacement spout, handle, trim, or valve | The new fixture, matched to your existing connection |
| Slip-on or threaded adapter | When the pipe stub is the wrong length or type, if the manufacturer allows it |
| Silicone or tub-and-tile sealant | Sealing the gap between spout and wall where instructions call for it |
| Fine sandpaper or abrasive pad | Cleaning the copper pipe surface |
| Cloth, bucket, towels | Cleanup and catching drips |
| Flashlight | Inspecting under the spout and behind the trim |
| Manufacturer’s installation sheet | The final word on specifications |
One golden rule to remember: never wrap PTFE tape on a connection that seals with an O-ring, gasket, or other built-in sealing surface. A slip-on spout seals internally, so putting tape on the copper pipe is a big no-no. Tape is strictly for tapered threads that depend on thread sealing.
What to Do Before You Install a Bathtub Faucet
Good preparation stops most problems before they start.
- Identify the existing setup. Look under the spout for a set screw. Check if a handle and trim plate are there. Note whether the faucet has a diverter knob.
- Confirm compatibility. Take the old part to the store, or snap a photo of it with measurements. For a spout, you need the connection type (slip-on or threaded), the pipe size, and how far the pipe projects from the wall.
- Read the installation sheet. Brands like Moen, Delta, Kohler, and American Standard publish instructions for every model. Specs differ, so never assume one brand’s numbers apply to another.
- Shut off the water. Swapping a spout or handle might not need the main shutoff if your tub has a local shutoff valve (often behind an access panel). If there are no fixture shutoffs, shut off the main supply. Valve work generally requires closing the water to that line or the whole house.
- Relieve pressure. Open the faucet, and a nearby sink faucet at a higher point if you can, to drain the lines. Never work on pressurized plumbing.
- Protect the tub. Lay a towel or cardboard inside the tub, and plug the drain so small screws and parts cannot fall in.
- Prepare access. If the valve sits behind a wall, find the access panel, often in an adjacent closet or room. If there is none, a valve replacement may require opening the wall.
How to Remove an Old Bathtub Faucet
Removing a Slip-On Spout
Shine a flashlight underneath the spout and locate the set screw. Use the correct hex key or screwdriver and loosen the screw a few turns. You do not need to take it out completely. Pull the spout straight off the pipe, adding a slight twist if it resists. Inspect the copper pipe. Look for corrosion, pitting, dents, or burrs. Wipe it clean. If the spout refuses to come off after loosening the screw, mineral buildup or the old seal might be gripping the pipe. Twist it gently. Do not pry against the wall or lever hard on the pipe, because that pipe is connected to plumbing inside the wall.
Removing a Threaded Spout
Confirm there is no set screw. Turn the spout counterclockwise. Use a strap wrench or a pipe wrench with a cloth pad to protect the finish if you are tossing the spout anyway, or hold the pipe steady if possible. Support the pipe stub as you turn, since forcing it can twist the pipe inside the wall. Once the spout is off, clean old tape or sealant from the threads and inspect them for damage.
Removing a Complete Faucet Assembly
Handle and trim removal comes first. Pry off the cap or locate the set screw on the handle. Remove the handle, then the trim plate, and you will see the valve or cartridge. Many cartridges need a specific puller, clip, or retaining nut removal sequence, and the steps differ by brand and model. Look up the instructions for your exact valve. Do not force anything that is stuck. Taking out the valve body itself means cutting or unthreading the supply connections, which we cover in Method 3 below.
How to Install a Bathtub Faucet
Method 1: Installing a Slip-On Bathtub Spout
Assumptions: You have a smooth 1/2 inch nominal copper pipe projecting from the wall, and a slip-on spout rated for that size.
- Verify the pipe and spout match. Check the pipe diameter and how far the pipe sticks out of the wall. Compare these with the new spout’s installation sheet.
- Inspect and clean the pipe. Look for corrosion, dents, and sharp edges. Lightly clean the copper with fine abrasive so the seal sits on a smooth surface. Wipe away debris.
- Deburr if needed. If you cut the pipe, remove burrs inside and out with a deburring tool or fine file, so they do not tear the internal seal.
- Check the projection. If the pipe is too long, trim it with a tubing cutter (this is a plumbing modification, so only do it if you are comfortable). If it is too short, you may need a slip-on adapter or a threaded adapter, if the manufacturer allows one.
- Slide the spout on. Push it straight on until it seats against the wall.
- Align it. Make sure it sits level and points down into the tub.
- Tighten the set screw. Use the specified tool. Tighten until the spout is firm and does not rotate or pull off. Stop there. Excess force can dent the copper, which makes the spout harder to remove later and can compromise the seal.
- Seal the wall gap if instructed. Some manufacturers call for caulk between the spout and wall, and some installers leave the underside open so a leak is easier to notice. Follow your instruction sheet.
- Test. Restore the water and check for leaks, covered in the testing section.
Why leaks happen here: a pipe that sticks out too little or too far, a damaged or corroded pipe surface, burrs that cut the seal, and a spout that is not pushed fully on can all cause water to escape at the wall.
Method 2: Installing a Threaded Bathtub Spout
Assumptions: You have a threaded pipe stub or fitting, and a spout with a matching thread.
- Verify the thread. Confirm the spout is designed for your connection. A common size is 1/2 inch, but 3/4 inch also exists, so check the instruction sheet.
- Inspect the threads. Look for damage, cross-threading marks, and corrosion. Clean off old tape and sealant.
- Seal appropriately. Tapered pipe threads typically use PTFE tape or pipe-thread sealant. Wrap tape clockwise (as you look at the end of the pipe) so it tightens as the spout turns on. Use only what the instructions call for. If your spout seals with a gasket, O-ring, or a compression surface, follow that design and skip the tape.
- Start by hand. Thread the spout on carefully, by hand first. If it binds, back off and restart rather than forcing it.
- Tighten without overdoing it. Snug it with a wrench or strap wrench, supporting the pipe stub so it does not twist behind the wall.
- Align. Stop when the spout points downward. Do not back it off after sealing, since backing off a tapered thread can create a leak path.
- Test for leaks as described below.
Different threaded connections can need different sealing methods, so the label on your product is the ultimate authority.
Method 3: Installing a Complete Tub and Shower Faucet Assembly
This is an advanced installation. It can require soldering, cutting pipe, PEX connections, wall repair, and local permits. Many homeowners hire a licensed plumber for it, and in some jurisdictions the work must be permitted or done by a licensed professional. This section gives the general process, not a substitute for the manufacturer’s instructions.
- Confirm compatibility. Verify the replacement valve works with your existing plumbing, supply type (copper, PEX, CPVC, galvanized), and trim style. Rough-in specifications, such as depth from the finished wall and port positions, are specific to each valve model. Use the manufacturer’s rough-in sheet and do not rely on general measurements.
- Shut off the water at the correct supply point and drain the lines.
- Access the plumbing through an access panel or by opening the wall.
- Remove the old valve if replacement is necessary. This may involve cutting or unsoldering the connections.
- Prepare the supply connections. Hot and cold lines need clean, correct connections for your pipe type. Make sure hot and cold are not reversed. Most valves mark the inlets, and the instruction sheet shows the correct layout.
- Position and secure the valve at the specified depth, braced properly in the wall as the instructions require.
- Connect the outlets to the tub spout line and the shower riser where applicable.
- Install the cartridge and trim per the manufacturer’s sequence. Many installers keep the cartridge out until the lines are flushed, to avoid debris damaging it.
- Flush the lines where the instructions require it.
- Test the valve, temperature control, and every connection before closing the wall.
Tub and shower valves also fall under safety rules. The International Plumbing Code addresses scald protection for tub and shower valves, and your local code may add requirements on top. Check with your local building department about permits and code before you start.
How to Install a Bathtub Faucet Handle
Swapping a handle and trim without replacing the valve is much simpler, but compatibility is the deciding factor. A handle must fit the stem or cartridge splines and the trim must fit the valve body.
- Shut off the water if you plan to remove the trim plate or touch the cartridge. For a handle swap alone, many people leave it on, but turning it off is safer.
- Remove the handle cap, if there is one, with a small flathead screwdriver.
- Remove the retaining screw with the correct tool.
- Pull off the handle. If it sticks, use a handle puller or gentle rocking, rather than prying against the wall.
- Check the stem or cartridge. Compare it with the new handle’s instructions to confirm compatibility. If the cartridge is worn, replace it with the exact matching part.
- Position the new handle in the correct orientation, with the stop in the right place, so hot is hot.
- Tighten the mounting screw firmly, but not hard enough to crack the handle.
- Install the trim plate (escutcheon) and seal if the instructions call for it.
- Restore the water and test movement and temperature.
A new handle must match the existing valve brand and cartridge, in most cases. Handles are not universal, and a style that looks identical can have a different spline count or stem size.
How to Test a Newly Installed Bathtub Faucet
Testing is not just turning on the tap. Use this checklist.
- Restore the water gradually. Open the shutoff slowly instead of all at once.
- Inspect visible connections at the wall, spout, and trim before running the water.
- Turn the faucet on and off and check smooth operation.
- Test hot and cold separately and confirm they are not reversed.
- Check the spout for drips at the wall and at the outlet.
- Test the diverter if the faucet has a showerhead connection. It should send water to the shower when engaged and hold reasonably well.
- Watch after shutoff for dripping.
- Check behind the access panel for dampness if you worked on the valve or concealed plumbing, and look again after 15 to 30 minutes and again a day later.
- Confirm stable flow. Weak or sputtering flow can mean trapped debris or a partly closed shutoff.
Checking only the spout is not enough when concealed plumbing was touched, because a slow leak in the wall can run for weeks before showing up as stains, soft drywall, or mold. If you ever find water damage or musty odors, see our guide on mold removal.
Common Bathtub Faucet Installation Problems
| Problem | Possible cause | What to do |
|---|---|---|
| Leak at the pipe connection | Wrong fitting, damaged seal, missing or incorrect sealing method | Recheck compatibility and whether the connection seals by thread or by internal gasket |
| Leak behind the wall | Loose or damaged concealed connection | Shut off the water and inspect the plumbing; call a plumber if you cannot reach it |
| Spout feels loose | Set screw not tight, pipe projection too short | Retighten; check pipe length and the mounting design |
| Dripping after shutoff | Worn cartridge, valve seat, or internal part | Replace the exact matching cartridge or components |
| Poor flow | Debris, blocked aerator or showerhead, partly closed shutoff | Clean applicable parts; check the shutoffs |
| Diverter does not hold | Worn or incompatible diverter | Inspect or replace with the correct part |
| Hot and cold reversed | Supply lines swapped or cartridge installed backward | Verify plumbing and cartridge orientation against the manufacturer’s instructions |
Do not assume every leak has the same cause. A drip at the spout outlet, a seep at the wall, and a drip from a shower arm are separate problems with separate fixes.
Common Mistakes to Avoid
- Buying an incompatible faucet. Identify the connection type and measure before you shop. Take a photo of the old fixture with you.
- Confusing slip-on with threaded spouts. Look for the set screw. Do not force a threaded spout onto smooth pipe or a slip-on over threads.
- Ignoring pipe diameter and projection. Compare against the new spout’s sheet. Use an adapter only if the manufacturer permits.
- Damaging the copper pipe. Avoid prying and over-tightening set screws.
- Using the wrong sealing material. PTFE tape belongs on tapered threads, not on gasketed or O-ring seals.
- Overtightening. It can crack fittings, strip threads, dent copper, or deform seals.
- Installing the wrong cartridge. Match the brand and model exactly.
- Skipping the shutoff. Always depressurize before opening any plumbing.
- Ignoring rough-in specifications. Valves and wall or freestanding fillers depend on exact dimensions from the manufacturer.
- Not testing concealed connections. Check behind the wall access and recheck later.
- Applying too much silicone. A thin, neat bead is enough, and it can hide leaks if overused.
- Ignoring local plumbing requirements. Permits and code vary by city, county, and state.
Three Practical Scenarios
These are illustrative examples, not case studies, and they do not include dimensions because those vary by product.
Example 1: Replacing a slip-on spout. Existing: a slip-on spout with a visible set screw and a smooth copper pipe. Check: the pipe condition, how far it projects from the wall, and the new spout’s pipe size. Tools: hex key, cloth, abrasive pad, flashlight, optional sealant. Steps: loosen the screw, remove the old spout, clean the pipe, slide on the new one, align it, tighten the set screw, and seal if directed. Complication: the pipe is too short or has corrosion. Verify: no wobble, no drip at the wall when the water runs, and no leak after shutoff.
Example 2: Replacing a threaded spout with another threaded spout. Existing: a spout that unscrews and a threaded stub. Check: the thread size and the thread condition. Tools: strap wrench or pipe wrench, PTFE tape or the sealant the instructions require. Steps: unscrew, clean the threads, seal as directed, thread on by hand, snug and align. Complication: a stuck spout or a twisting stub-out. Stop forcing it and call a plumber if the pipe moves. Verify: check the wall seam and the diverter operation.
Example 3: Replacing a complete tub and shower valve. Existing: a single-handle valve with a trim kit, behind a wall with an access panel. Check: pipe type, rough-in sheet for the new valve, permit rules. Tools: depends on pipe type and may include a tubing cutter, torch or PEX tool, and wall repair supplies. Steps: shut off the water, remove the trim and old valve, connect the new valve to hot and cold, secure it, connect outlets, flush, install the cartridge and trim, test. Complication: corroded pipes, a mismatched valve depth, or no access. Verify: test before closing the wall and check again after a day.
How Much Does Bathtub Faucet Installation Cost?
Costs vary wildly based on your location, the fixture, and the condition of your plumbing. These figures are estimates for illustration, researched in November 2026 from US sources, and none of them is a universal price.
- Local plumber pricing (Seattle area, July 2026): One Seattle plumbing company lists bathtub faucet installation at roughly $200 to $600, shower cartridge replacement at roughly $100 to $300, and says a straightforward tub and shower faucet swap with accessible plumbing takes two to three hours, while opening a wall can take half a day or more. That range covers labor and varies with the job.
- Online estimator (Baltimore, Maryland, updated 2026): One contractor estimating tool puts a typical total for a basic bathtub faucet replacement in Baltimore at about $225 to $450, based on about two hours of labor plus materials. This is a calculated estimate from a software tool, not a quote.
- Materials example: The same estimating tool assumes a replacement faucet at about $60 to $180, with small supplies such as thread seal tape and sealant at a few dollars each.
What moves the price:
| Cost factor | Effect |
|---|---|
| Faucet purchase price | Finish, brand, and style change the part cost significantly |
| Spout versus complete assembly | A spout swap is the low end; a full valve and trim is the high end |
| Valve replacement | Adds parts and labor, especially with soldering |
| Plumbing modifications | Corroded or nonstandard pipes can add hours |
| Wall access and repair | Opening and patching tile or drywall adds cost |
| Additional fittings | Adapters, supply lines, and shutoff valves add materials |
| Location and complexity | Labor rates and permit fees differ by region |
Labor is the main cost difference between a DIY spout replacement, which is mostly the price of the part, and a valve replacement by a professional. Get two or three local quotes for valve work.
When Should You Hire a Plumber?
A confident homeowner can usually handle a spout replacement or a handle and trim swap. Call a licensed plumber when:
- The work needs concealed plumbing to be modified.
- The mixing valve needs to be replaced.
- Pipes are corroded, brittle, or damaged.
- Connections are inaccessible, with no access panel.
- Soldering or specialized pipe connections (PEX, CPVC, galvanized transitions) are involved.
- Leaks persist after you have rechecked the installation.
- Local code or permit rules apply, which is common for valve replacement.
- You are installing a wall-mounted or freestanding tub filler that needs new rough-in.
Not every bathtub faucet job requires a pro. If you can see the pipe, identify the connection, and follow the manufacturer’s sheet, a simple spout or handle replacement is a reasonable project.
Frequently Asked Questions
Can I install a bathtub faucet myself? For a spout or handle replacement, usually yes. For a new valve or any concealed plumbing, a licensed plumber is the safer choice.
How long does it take to install a bathtub faucet? A spout replacement often takes under an hour. Handle and trim work takes a similar amount of time. A valve replacement can take several hours to a full day, depending on access and pipe type.
Do I need to turn off the main water supply to replace a bathtub faucet? Not always. A tub with a local shutoff can be isolated. Without one, shut off the main supply. Valve work should always be done with the water off and the lines drained.
How do I know whether my tub spout is threaded or slip-on? Check under the spout near the wall. A small set screw means slip-on. No screw usually means threaded, but a soldered spout is also possible.
Can I replace a bathtub spout without replacing the valve? Yes. The spout is a separate part from the valve. Replace only the spout unless the valve is the source of the problem.
How do I stop a bathtub faucet from leaking? Find the source first. A leak at the spout wall seam suggests a loose set screw, bad seal, or wrong pipe length. A drip from the spout outlet after shutoff suggests a cartridge or valve seat issue.
Do I need plumber’s tape when installing a bathtub spout? Only for tapered threaded connections where the instructions call for it. Do not use tape on a slip-on spout or any connection sealed with an O-ring or gasket.
Can I replace a bathtub faucet without opening the wall? Often yes for spouts, handles, and trim, and for some cartridge swaps. Replacing the valve body usually requires access, either through a panel or by opening the wall.
How much does it cost to replace a bathtub faucet? Ranges in the 2026 sources above run from about $200 to $600 for professional installation in one US market, and roughly $225 to $450 in one estimator’s Baltimore figure. A DIY spout replacement can cost little more than the part.
When should I replace the bathtub faucet valve? Consider it when the handle will not shut the water off completely after a cartridge replacement, the valve body is corroded or leaking, parts for your model are no longer available, or you want updated scald protection.
Conclusion
The real secret to installing a bathtub faucet is identifying exactly what you have before you start. Check for the set screw to tell slip-on from threaded, match the new part to the old connection, depressurize the plumbing, and follow the manufacturer’s sheet. Leave valve replacement to a licensed plumber unless you have the skills and the permits sorted. After any job, test thoroughly, and recheck behind the wall access later. Before you buy parts, photograph the old fixture and note the pipe size and projection. That one step prevents most return trips to the store.