
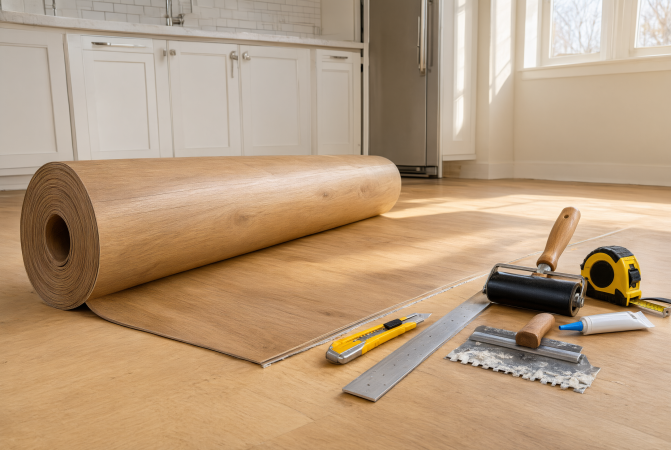
When you’re shopping for flooring that won’t break the bank but still holds up in high-traffic areas, sheet vinyl flooring often ends up on the shortlist. Sold in wide rolls—typically 6 feet or 12 feet across—this material installs as one continuous piece, which means you’re dealing with minimal seams in most rooms. That’s exactly why it’s been a go-to choice for bathrooms, kitchens, laundry rooms, and properly prepped basements for decades.
Price-wise, it sits at the lower end of the flooring spectrum. But here’s the thing: the gap between a floor that lasts and one that disappoints comes down to three factors—the wear layer, the backing, and how it’s installed. This guide breaks down each of those elements, then walks you through buying, measuring, and laying the floor from start to finish.
What Is Sheet Vinyl Flooring?
At its core, sheet vinyl flooring is a flexible polyvinyl chloride (PVC) floor covering that comes in wide rolls. You’ll hear it called vinyl sheet flooring, vinyl roll flooring, vinyl flooring sheets, or resilient sheet flooring depending on who you’re talking to. Some folks still refer to it as linoleum, but that’s actually a different material altogether—linoleum is made primarily from linseed oil, not PVC.
Since vinyl is a plastic, the answer to “is vinyl flooring basically plastic?” is straightforward: yes. In the flooring world, “vinyl” and “PVC” point to essentially the same polymer, so PVC flooring isn’t a separate or superior product category.
People mix up these terms all the time, but they describe different formats:
| Term | What it is | Typical format |
|---|---|---|
| Sheet vinyl | One continuous flexible covering | Rolls, commonly 6 ft or 12 ft wide |
| Vinyl tile | Individual square tiles | Often 12 in by 12 in, many seams |
| Luxury vinyl plank (LVP) | Plank format imitating wood, often with rigid or semi-rigid core | Planks, usually floating or glued |
| Luxury vinyl tile (LVT) | Tile format imitating stone or ceramic | Tiles or planks |
Now, “vinyl tile sheet flooring” isn’t really a standard product category. When shoppers use that phrase, they’re usually looking for either sheet vinyl printed with a tile pattern, or individual vinyl tiles. The first comes in rolls; the second doesn’t.
How Sheet Vinyl Flooring Is Made
Sheet vinyl is built up in layers. A backing sits against the subfloor, a decorative layer carries the color or pattern, and a clear wear layer with a surface coating protects the design underneath. The way that pattern gets created is what separates product grades from each other:
Printed vinyl (often called rotovinyl) has the pattern printed onto a layer. It’s the more affordable construction and generally less durable than inlaid vinyl.
Inlaid vinyl gets its color from tiny vinyl granules or chips pressed into the surface, so the pattern runs deeper into the wear surface and tends to hide traffic marks better.
Sheet vinyl is manufactured in 6 ft and 12 ft widths according to the Resilient Floor Covering Institute (RFCI). That’s why a typical bedroom or bathroom can be covered without a seam, while a wider room might need one.
Types of Sheet Vinyl Flooring
Manufacturers don’t all use the same category names, so always check the product’s own specification sheet. Here’s a summary of the common constructions:
| Type | Main characteristics | Potential advantages | Considerations |
|---|---|---|---|
| Homogeneous | One solid layer, color and pattern run through the thickness | Wear is less visible, strong under rolling loads | Fewer design options, mostly commercial |
| Heterogeneous | Multiple layers: backing, print or design layer, wear layer | Wide range of looks, common in homes | Damage to the surface layer is harder to hide |
| Felt-backed | Felt backing under the vinyl | Common in residential lines | Often requires full-spread adhesive; select products allow perimeter bonding |
| Fiberglass-reinforced | Fiberglass layer for dimensional stability | Stable, resists shrinking and curling | Perimeter fastening is not allowed for some products |
| Cushioned | Foam or soft backing layer | Softer and warmer underfoot | Can dent under heavy loads; not suitable under some adhesive systems |
| Plain (solid color) | Little or no pattern | Clean, simple look | Dirt, scratches, and seams can be more noticeable |
| Printed or decorative | Patterns that mimic wood, stone, or tile | Huge variety | Pattern matching at seams needs planning |
Homogeneous and Heterogeneous Sheet Vinyl
Homogeneous sheet is a single layer of the same vinyl mix from top to bottom—sometimes called through-color. One manufacturer describes it as typically about 2 millimeters (0.079 in) thick, and it’s mostly used in commercial settings. Heterogeneous sheet has several layers and is the most common construction in homes. Both are legitimate constructions; neither is automatically better. For a house, heterogeneous sheet is typically the practical choice because of its design range and price.
Cushioned and Backed Sheet Vinyl
Backing determines how the floor behaves, not just how it feels. Felt-backed products usually call for a permanent full-spread adhesive, though some can be perimeter bonded. Fiberglass-reinforced products stay dimensionally stable and, in at least one manufacturer’s instructions, must not be perimeter fastened. Cushioned products feel softer but shouldn’t be assumed to work with every installation method. If you’re matching a backing to a subfloor, use the manufacturer’s guide rather than general advice.
Plain and Decorative Sheet Vinyl
Plain sheet vinyl is a solid or nearly solid color. Decorative sheet vinyl carries a printed or inlaid pattern. A pattern with a repeat needs extra material to line up at seams, which affects how much you buy (see the buying section below).
Benefits of Sheet Vinyl Flooring
- Lower cost than many alternatives. Both material and installation are often cheaper than tile or hardwood.
- Few seams. A single wide sheet can cover a small room from wall to wall.
- Water-resistant surface. The wear surface doesn’t absorb water, though the installation still matters (see below).
- Easy routine cleaning. Sweeping and damp mopping handle most dirt.
- Comfort. It’s softer underfoot than ceramic tile, and cushioned products add more give.
- Design variety. Patterns can resemble wood, stone, or tile.
- Manageable installation in simple rooms. A small, rectangular room is more approachable than many other floors.
These advantages depend on quality. A thin, low-grade product installed over a poorly prepared subfloor won’t deliver them.
Disadvantages of Sheet Vinyl Flooring
- Telegraphing. Bumps, seams, screw heads, and ridges in the subfloor can show through the surface.
- Cuts and punctures. Sharp objects can slice or gouge it.
- Dents. Heavy furniture and appliances can leave permanent indentations, especially on cushioned products.
- Hard to repair invisibly. A damaged section usually means a patch that may be visible, or replacing the whole sheet.
- Adhesive and prep work. Many products need a specific adhesive and a smooth, clean substrate.
- Edges and seams are weak points. If water gets under poorly sealed edges, it can damage the subfloor.
- Quality varies widely. Entry-level products may wear out sooner.
- Removal can be messy. Old glued-down sheet vinyl can be hard to scrape off.
Older resilient floors may contain asbestos, so if you’re removing a floor from an older home, test or follow the RFCI’s recommended work practices before sanding or scraping.
Is Sheet Vinyl Flooring Waterproof?
The vinyl itself is waterproof or at least highly water-resistant, because the material doesn’t absorb water. But a floor is more than its surface. Water can still reach the subfloor through unsealed seams, edges, and openings around pipes and toilet flanges, and moisture coming up from a concrete slab can cause problems from below.
So it helps to separate two things:
- Waterproof material: the vinyl layer doesn’t soak up water.
- Waterproof installation: seams, perimeters, and penetrations are finished in the way the manufacturer specifies so water can’t reach the substrate.
A sheet with few seams has fewer places for water to enter, but “fewer” isn’t “none.” Whether a particular product is approved for wet areas depends on the manufacturer’s instructions, and installation quality decides how it performs.
Can You Use Sheet Vinyl Flooring in Bathrooms and Kitchens?
Yes, in many cases. Sheet vinyl is a common choice for both rooms because it’s water-resistant, easy to clean, and available in large pieces. But not every product is approved for every wet-area installation, so check the product’s documentation before buying.
Bathrooms. Pay close attention to the edge of the floor at the tub or shower, the toilet flange, and any floor drains. A wide sheet that covers the whole bathroom avoids seams in the wettest part of the room. Follow the manufacturer’s method for sealing edges and cut-outs.
Kitchens. Spills are easy to wipe up, but refrigerators and dishwashers can leak or drip over time. Whether base cabinets can go on top of the flooring depends on the installation system. One manufacturer’s guide, for example, allows cabinets on top of the floor with a full-spread pressure-sensitive adhesive but not with a modified loose-lay method.
For either room, check surface texture and any slip-resistance information, as glossy, smooth finishes can be slick when wet.
Sheet Vinyl Flooring Thickness Guide
There are two thickness numbers that matter, and they measure different things:
Total thickness is the overall thickness of the floor, usually in millimeters or inches. It reflects the backing and layers together and affects how the floor feels and how it handles subfloor imperfections.
Wear layer is the protective top layer, measured in mils. A mil is one thousandth of an inch (0.001 in, or about 0.0254 mm). The wear layer largely determines how well the surface resists scuffs, scratches, and daily wear.
A thicker floor doesn’t automatically last longer. A thick floor with a thin wear layer can still wear through quickly, while a thinner floor with a good wear layer can perform well. The Wood Flooring Contractors Association (WFCA) makes the same point: look for a thick wear layer, not just thick flooring.
| Specification | What it measures | Why it matters |
|---|---|---|
| Total thickness | Overall product thickness (mm or in) | Feel underfoot, stability, how much it hides subfloor texture |
| Wear layer | Protective top layer (mils) | Resistance to scratches, scuffs, and traffic wear |
| Backing | Supporting bottom layer (felt, fiberglass, foam, vinyl) | Dimensional stability and which installation methods are allowed |
Unit Conversions
| Mils | Inches | Millimeters |
|---|---|---|
| 6 mil | 0.006 in | 0.15 mm |
| 12 mil | 0.012 in | 0.30 mm |
| 20 mil | 0.020 in | 0.51 mm |
For total thickness, 2 mm is about 0.079 in and 3 mm is about 0.118 in.
How to Choose the Right Thickness
There’s no universal best thickness. One manufacturer lists typical wear layers in its sheet line as 6, 12, or 20 mil, and says the 20 mil option can hold up in commercial settings. Another source suggests heterogeneous sheet is commonly around 3 mm thick. Treat these as examples, not standards, because different brands specify different constructions.
A practical way to choose:
- Lighter use (guest bathroom, bedroom): a basic wear layer may be enough.
- Everyday family rooms, kitchens, entries: look for a higher wear layer and a respected warranty.
- Heavy traffic or rolling loads: consider the thickest wear layer you can find, or a commercial-grade product.
Compare the wear layer, backing, and warranty together, not total thickness alone. In the United States, the standard for sheet vinyl with backing is ASTM F1303, which classifies wear layer, overall thickness, and backing type; ask whether a product meets the standard that applies to it.
How to Choose the Best Sheet Vinyl Flooring
No single brand or product is best for everyone. Instead, compare these factors:
- Wear layer specification (in mils) and what the warranty says about wear.
- Backing and construction (felt, fiberglass, cushion), since this determines how it must be installed.
- Installation method the manufacturer requires: full spread, perimeter bond, or loose lay.
- Subfloor compatibility: wood underlayment, concrete, or existing flooring.
- Water-resistance and wet-room approval in the product documents.
- Pattern and texture, including whether a pattern repeat will increase waste.
- Warranty terms, especially what voids coverage (wrong adhesive, skipped moisture testing, improper prep).
- Cleaning requirements for the finish.
Established brands offering residential sheet vinyl in the US include Armstrong (sold through AHF Products), Tarkett (FiberFloor), Mohawk and STAINMASTER, Congoleum, Shaw (DuraTru), and Mannington. Check each current product line, as lines and warranties change. Compare product specifications instead of relying on brand names or rankings.
How Much Sheet Vinyl Flooring Do You Need?
Rolls are sold by width, so material is purchased as a width multiplied by a cut length, not just room area. The layout determines waste, not a flat percentage.
Example (illustrative): A kitchen is 10 ft by 13 ft, which is 130 square feet. With a 12 ft wide roll, you’d cut a piece 13 ft long plus a trimming allowance. If you allow 6 inches (0.5 ft) extra, the piece is 13.5 ft long. The material is 12 ft by 13.5 ft = 162 square feet. The extra beyond the room is 32 square feet. In a smaller room such as a 5 ft by 8 ft bathroom (40 square feet), a 6 ft wide roll cut 8 ft long is 48 square feet.
Room shape, roll width, seams, and pattern repeat all change the number, so sketch the layout before ordering. Use the manufacturer’s guidance on trimming allowances, and ask about pattern match at seams. For a simple square-footage check, a general flooring calculator can help, but a roll layout sketch matters more with sheet vinyl.
How to Install Sheet Vinyl Flooring
The specifics depend on the product. Always follow the manufacturer’s installation guide, because adhesive, subfloor, and method requirements differ and can affect your warranty. The general sequence below applies to most residential jobs.
Tools and Materials
| Tool or material | Purpose |
|---|---|
| Measuring tape | Measure the room |
| Utility knife with fresh blades | Cut the vinyl |
| Straightedge | Guide long, accurate cuts |
| Flooring roller or seam roller | Press the floor into the adhesive |
| Manufacturer-specified adhesive | Bond the flooring when the method requires it |
| Notched trowel (size per adhesive label) | Spread adhesive evenly |
| Floor scraper | Remove old adhesive and debris |
| Subfloor patch or underlayment | Level and repair the surface |
| Seam sealer or seam adhesive | Treat seams when required |
Step 1: Prepare the Subfloor
Remove furniture and, where practical, baseboards or trim. Remove old flooring when the manufacturer requires it, since not every existing floor can be covered. The subfloor must be clean, dry, flat, and structurally sound. Fill cracks and holes, sand down ridges, and fix loose boards, because imperfections can telegraph through.
Check moisture, especially on concrete. Manufacturer guides call for calcium chloride or relative humidity testing on concrete, and bond tests when using full-spread adhesive. Some products also restrict certain substrates: a Stainmaster guide, for example, doesn’t recommend installing directly over fire-retardant or preservative-treated plywood, and a Shaw guide says not to install full-spread over perimeter-bonded vinyl, cushion vinyl, or floating floors.
Step 2: Measure the Room
Measure length and width at the widest points, and include alcoves, closets, and doorways. Measure around fixtures, and record irregular corners. Draw a floor plan to scale. Don’t rely on a single measurement, since walls are rarely perfectly square.
Step 3: Select and Position the Roll
Decide the direction of the sheet, where seams (if any) will fall, and how pattern repeats will line up. Keep seams out of the busiest and wettest spots when you can. Unroll the sheet in the room so it can relax and flatten.
Step 4: Acclimate the Flooring
Acclimation requirements differ. Armstrong states that most of its sheet vinyl doesn’t need formal acclimation, but should be unrolled just before installation so it relaxes. Mohawk’s residential guide, in contrast, calls for the job site, flooring, and adhesive to stay between 65°F and 85°F (18°C and 29°C) for 24 hours before, during, and after installation. Check your product’s requirement instead of assuming one number applies.
Step 5: Cut and Fit
Rough-cut the sheet to the room shape, leaving extra at the walls to trim. Make relief cuts at corners, then trim to the wall with a straightedge and a sharp knife. Cut around pipes and toilet flanges carefully. If the product is a modified loose-lay type, one manufacturer calls for a 1/4 inch (6.35 mm) gap at vertical surfaces. Seams, where needed, are often cut with a double-cut technique for residential rotovinyl and then treated with seam sealer, as described in Armstrong’s installation manual. Cut slowly, since a mistake on a large sheet is expensive.
Step 6: Apply Adhesive, If Required
There are three common approaches, and the product dictates which one applies:
- Full-spread: adhesive over the entire subfloor. Mohawk’s residential guide recommends a releasable full-spread method using pressure-sensitive adhesive, with permanent full spread reserved for special needs such as rolling or very heavy traffic.
- Perimeter bond: adhesive only around the edges and seams. Not every product allows it.
- Loose-lay: no full adhesive. Mohawk limits loose-lay to areas of 25 square yards or less with no more than one seam.
Use only the adhesive the manufacturer specifies, with the correct trowel, open time, and working time. Fold back half the sheet, spread adhesive, lay the vinyl into it, and roll it. Repeat for the other half.
Step 7: Finish the Installation
Roll the floor as directed, finish seams with the seam sealer, trim the edges, and wipe up adhesive residue right away. Reinstall baseboards and transitions. Follow the curing and furniture-placement instructions, and keep moisture out of edges until the adhesive has set. In bathrooms and wet areas, use the manufacturer’s approved edge and seam details.
Is Sheet Vinyl Flooring Easy to Install?
In a small, square room with a flat subfloor, a careful DIYer can often do it. But the sheet is large and awkward, cuts aren’t forgiving, and the adhesive has a working time. Professional installation is worth considering for:
- Large or irregular rooms.
- Rooms that need one or more seams.
- Complex bathrooms with several cut-outs.
- Floors that need major subfloor repair.
- Products requiring special adhesives or seam techniques.
Sheet vinyl isn’t a beginner project in every situation, so measure your confidence against the room, not just the product.
How Long Does Sheet Vinyl Flooring Last?
There’s no single number. Lifespan depends on the product’s wear layer, foot traffic, installation quality, subfloor condition, cleaning habits, sunlight, furniture loads, and moisture problems. Manufacturer warranties describe coverage terms, not how long the floor will actually last, so don’t treat a warranty period as a prediction. A quality product, installed properly and maintained well, can last for many years, while a thin, low-grade floor in a busy kitchen will wear faster.
How to Clean and Maintain Sheet Vinyl Flooring
- Sweep or vacuum (with the beater bar off) regularly to remove grit that scratches.
- Damp mop with a cleaner approved by the manufacturer.
- Wipe spills promptly, and don’t leave standing water on seams or edges.
- Avoid abrasive pads, harsh solvents, and cleaners that can dull or damage the finish.
- Put felt pads under furniture and use wide-surface casters or protectors under heavy items.
- Lift, don’t drag, appliances and furniture, and protect the floor from sharp objects.
- Limit long sun exposure where possible, which can fade some patterns.
Sheet Vinyl vs. Other Flooring Types
The “best” floor depends on your budget, room conditions, expected wear, and look.
| Flooring | Main advantages | Main disadvantages | Suitable for |
|---|---|---|---|
| Sheet vinyl | Few seams, low cost, flexible designs | Cuts and dents, harder to repair, needs careful prep | Kitchens, bathrooms, laundry, living areas where approved |
| Vinyl tile | Individual pieces can be replaced | More seams | Residential rooms |
| LVP | Plank look, modular installation, easier to replace sections | More seams, limits vary by product | Living spaces and rooms the manufacturer approves |
| Ceramic or porcelain tile | Hard, durable surface | Hard and cold underfoot, higher installed cost, grout upkeep | Bathrooms, kitchens, entries |
| Laminate | Decorative planks, rigid feel | Moisture limits vary, edges can swell | Dry areas and approved applications |
This table isn’t a ranking.
Sheet vinyl vs. vinyl tile. Tiles are individual pieces, so you can replace one, but you’ll have more seams. Sheet has fewer seams but is harder to patch.
Sheet vinyl vs. LVP. LVP offers a convincing wood look and is easier to replace in sections, but it has many joints. Sheet vinyl typically costs less and has far fewer seams in a small room.
Sheet vinyl vs. ceramic or porcelain tile. Tile is harder and generally more durable against impact, but costs more to install and is cold and hard underfoot. Sheet vinyl is softer and cheaper, but can cut or dent.
Sheet vinyl vs. laminate. Laminate is a rigid plank product with more moisture limitations in general, so sheet vinyl is the usual pick in wet rooms. Always check the specific product.
Sheet Vinyl Flooring Cost
Prices vary by region, product, and job. Online estimates also vary a lot, so treat the figures below as rough guides, not quotes. As of May 2026, Homewyse estimates a national average starting at about $3.78 to $5.25 per square foot to install sheet vinyl, using residential-grade materials and including supplies. Modernize lists sheet vinyl at about $1 to $2 per square foot for materials and $1 to $3 for labor, or $2 to $5 installed, and notes many contractors charge a minimum fee of $150 to $300 per job.
Example (illustrative): A 120 square foot room (12 ft by 10 ft) at $3.78 to $5.25 per square foot comes to about $454 to $630 installed. That excludes extras.
Costs rise with removal of old flooring, subfloor repair or leveling, premium wear layers, trim, and complex layouts. ConsumerAffairs puts removal at roughly $1 to $4 per square foot and leveling at $2 to $8 per square foot. Because many figures cover different scopes, ask each contractor what the quote includes. Vinyl is usually cheaper than ceramic tile, but a premium sheet vinyl can narrow that gap.
Common Sheet Vinyl Installation Mistakes
- Skipping subfloor prep. Fill, sand, and clean first, so imperfections don’t show.
- Not testing moisture. Use the test the manufacturer requires, especially on concrete.
- Poor measurements. Measure twice and sketch the layout before cutting.
- Cutting too short. Leave a trimming allowance and cut to the wall slowly.
- Ignoring the pattern. Check the repeat and seam match before you cut.
- Wrong adhesive. Use the specified adhesive and trowel, not a generic product.
- Too much or too little adhesive. Follow the label and respect open time.
- Skipping rolling. Roll as directed so the sheet bonds fully.
- Unsealed edges in wet rooms. Follow the approved edge and seam details.
- Loading the floor too soon. Wait for the stated cure time before heavy furniture.
Frequently Asked Questions
Is sheet vinyl a good flooring option? It’s a good choice for budget-conscious projects and wet rooms, because it has few seams and is easy to clean. It’s less suited to spots where sharp objects, heavy loads, or an invisible repair matter.
What is another name for sheet vinyl flooring? Vinyl sheet flooring, vinyl roll flooring, and resilient sheet flooring. It’s sometimes loosely called linoleum, but linoleum is a different material.
How thick is sheet vinyl flooring? It varies. Total thickness is often in the range of a couple of millimeters, while wear layers are measured in mils, with 6, 12, and 20 mil appearing in one manufacturer’s line. Check the specification sheet.
Which thickness is best? The wear layer matters more than total thickness. Choose a thicker wear layer for kitchens and entries, and compare backing and warranty too.
Can you install sheet vinyl in a bathroom? Yes, if the product is approved for it and edges, seams, and cut-outs are finished as the manufacturer specifies.
Which is better, sheet vinyl or vinyl tile? Sheet has fewer seams, while tiles let you replace single pieces. The better choice depends on room size, water exposure, and repair needs.
Which is better, vinyl or laminate? Vinyl is generally the safer choice for moisture. Laminate can suit dry rooms. Check the specific product.
What is the biggest disadvantage of vinyl flooring? For sheet vinyl, it’s vulnerability to cuts, dents, and telegraphing from the subfloor, plus difficult invisible repairs.
What flooring is better than vinyl? It depends on needs. Porcelain tile is harder and often more durable, and hardwood has a different look and feel, but both usually cost more.
Conclusion
Sheet vinyl flooring works best when three things line up: a wear layer suited to the room, a backing that matches your subfloor and installation method, and an installation that follows the manufacturer’s instructions exactly. Before buying, read the specification sheet, confirm wet-room approval and the required adhesive, and sketch the roll layout so you know how much to order. Then decide honestly whether the room is simple enough for a DIY job or better handled by a professional.