
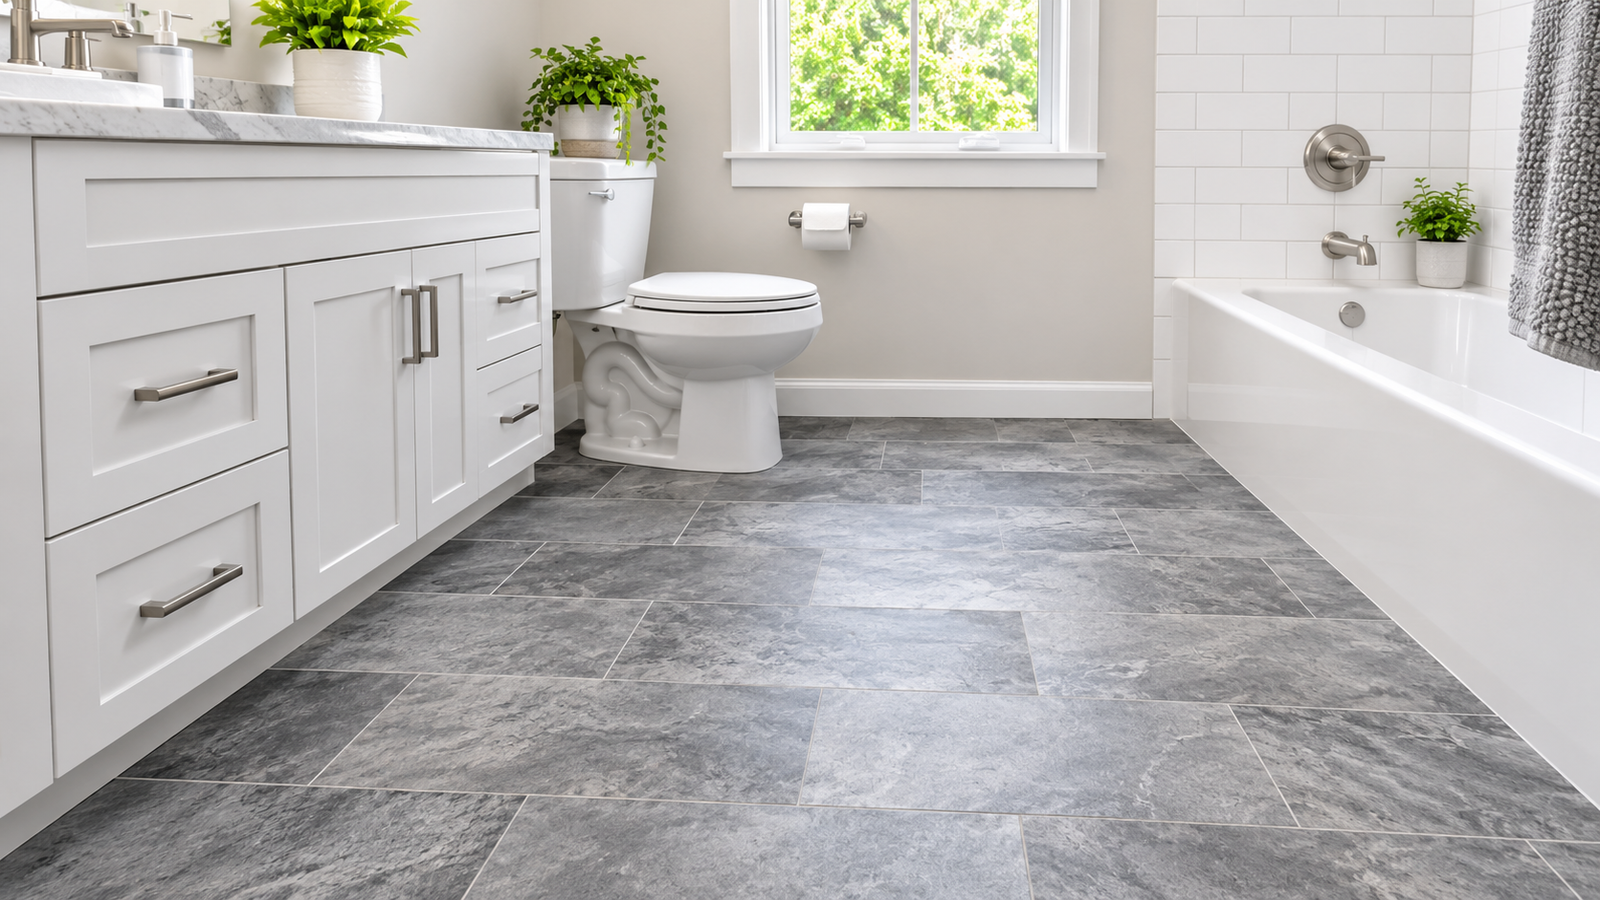
Short answer: Yes, LVT bathroom flooring works great for most bathrooms, as long as you pick a product that’s actually approved for bathroom use, get your subfloor flat and dry, and detail the edges properly. But here’s the thing—LVT won’t replace a properly waterproofed shower floor, and just because the box says “waterproof” doesn’t mean your entire bathroom floor is waterproof.
This guide walks you through everything: what LVT actually is, how it handles water, which type you should buy, design ideas (checkerboard, mosaic, black and white—you name it), how it stacks up against ceramic and porcelain tile, and exactly how to install it.
What Is LVT Bathroom Flooring?
Luxury vinyl tile (LVT) is basically a multilayer vinyl floor covering made in tile shapes—usually squares or rectangles—with a printed design that mimics stone, ceramic, marble, concrete, or wood. You’ll also hear about LVP (luxury vinyl plank), which is the same concept but in long, narrow planks. Honestly, most people use these terms pretty loosely, and a lot of products get sold as “LVT/LVP.”
Here’s what most LVT is built from:
- Wear layer: That clear coating on top that fights off scuffs and scratches. It’s measured in mils (1 mil = 0.001 inch).
- Decorative layer: The printed film that creates your stone or tile pattern.
- Core: The body of the product. Flexible LVT has a vinyl core; rigid-core products use a denser composite.
- Backing: A bottom layer that might add stability, sound reduction, or grip.
LVT is different from sheet vinyl, which comes in wide rolls with few seams, and from rigid-core flooring (often labeled SPC or WPC), which is thicker, stiffer, and almost always installed as a floating click-lock floor. Not every product labeled “LVT” is built or rated the same way, so the specific product’s technical data matters way more than the category name.
Is LVT Flooring Good for Bathrooms?
LVT works well in bathrooms because the material itself resists water, feels softer and warmer underfoot than ceramic or porcelain, and it’s pretty easy to clean. Most problems actually come from installation and moisture around the edges, not from the vinyl surface itself.
What works in its favor
Water resistance: Vinyl doesn’t absorb water the way wood or laminate cores can. Everyday splashes and damp towels aren’t an issue on a solid installation.
Comfort: The surface is less hard and cold than tile. Your feet will thank you.
Maintenance: There’s no grout to scrub or seal on the surface (unless you choose a grouted LVT system).
Style range: You can get convincing stone, marble, and tile looks without the weight and labor of real tile.
Repair potential: Depending on the system, a damaged tile or plank can sometimes be replaced individually.
What to watch
Not every product is approved for bathrooms. Check the manufacturer’s installation guide and warranty.
Water can sneak under the floor through open joints, unsealed perimeters, gaps around pipes, or leaks at the toilet or tub.
Subfloor problems show through. Glue-down LVT mirrors the surface beneath it, so bumps, ridges, and trowel marks can telegraph.
Heat, sharp objects, and heavy point loads can dent, gouge, or mark vinyl.
Lower-quality products may wear faster, fade, or show visible seams.
Waterproof Material vs. Waterproof Bathroom Floor
These three terms aren’t interchangeable:
| Term | What it means |
|---|---|
| Waterproof flooring material | The tile or plank itself doesn’t absorb or swell from water |
| Water-resistant flooring system | The installed floor handles normal splashes and cleaning when joints and edges are detailed properly |
| Waterproof assembly (substrate and membrane) | A designed system, often with a membrane, that stops water from reaching the structure |
Here’s the reality: a waterproof plank installed with open edges is still a floor that can let water reach the subfloor. Many manufacturers also exclude damage from standing water, flooding, or hydrostatic pressure from their waterproof warranties, which tells you where the real limits are.
Types of LVT for Bathrooms
The installation method affects how the floor handles moisture, how forgiving it is of subfloor flaws, and how much work the job takes.
Glue-down LVT is bonded to the subfloor with an approved adhesive. It gives you a stable, firmly fixed surface with no hollow sound, but it demands careful subfloor preparation, moisture testing, and the correct adhesive and trowel. It’s the most common choice where a solid, tight installation matters.
Click-lock LVT has interlocking edges and is usually installed as a floating floor over a prepared subfloor. It’s faster and doesn’t require adhesive, but floating floors need expansion gaps (where the manufacturer specifies them), and those perimeter gaps are the weak point in a bathroom unless the product’s instructions describe how to seal them.
Loose-lay LVT relies on a friction-grip backing and sometimes perimeter or partial adhesive. It can be convenient, but you must confirm that the specific product is approved for bathrooms and for the size of the room.
Rigid-core (SPC/WPC) flooring uses a stiff composite core, typically with click-lock joints. It’s thicker and more dimensionally stable than flexible LVT and tolerates minor subfloor imperfections better, but it’s still governed by its own manufacturer’s moisture and installation rules.
| Type | Installation | Main advantage | Key consideration |
|---|---|---|---|
| Glue-down LVT | Adhesive | Firm, bonded surface | Subfloor flatness, moisture testing, correct adhesive |
| Click-lock LVT | Interlocking joints | No adhesive, quicker install | Expansion gaps and perimeter sealing |
| Loose-lay LVT | Friction backing or specified fixing | Flexible installation | Bathroom approval and size limits |
| Rigid-core (SPC/WPC) | Usually click-lock | Stiff, stable construction | Manufacturer’s moisture and wet-area rules |
Glue-Down vs. Click-Lock in a Bathroom
| Factor | Glue-down | Click-lock |
|---|---|---|
| Subfloor preparation | Very exacting; imperfections can show | Somewhat more forgiving, still needs a flat, clean base |
| Moisture handling | Needs moisture testing and a compatible adhesive | Needs a dry subfloor; some products specify a moisture barrier |
| Joints | Tight, bonded seams | Locking edges; seams depend on product quality |
| Perimeter | Edges bonded; sealed at fixtures per instructions | Expansion gaps must be handled per instructions |
| Repair | Replace individual pieces; removing adhesive can be messy | Can sometimes be disassembled, depending on layout |
| DIY difficulty | Higher | Moderate |
For a small bathroom where a stable, tight finish matters, glue-down is often favored. For a quick renovation over a sound, flat surface, a bathroom-approved click-lock product can be a reasonable option. The manufacturer’s wording decides which is allowed.
LVT Bathroom Flooring Ideas
Design choice affects both the look and the practical experience: how big the room feels, how easily dust and water spots show, and how well the floor pairs with your walls and fixtures.
Tile-Effect LVT
Tile-effect LVT imitates ceramic, porcelain, slate, limestone, or marble. Large-format looks have fewer visible lines and can make a small room feel less busy, while smaller formats give a traditional feel. Some products include a printed grout line; others use a real grout system. Either way, the surface is vinyl and will feel different from fired tile.
Checkerboard LVT
A checkerboard floor, like classic black and white or a softer grey and white, suits traditional, vintage, and some contemporary bathrooms. Square size changes the effect. Larger squares usually feel bolder and calmer in a small room; smaller squares feel busier and more decorative. High contrast draws attention, so a quieter grey, cream, or taupe pairing is easier to live with in a tight space. Checkerboard layouts demand more careful planning and often more waste, because the pattern must stay square to the walls.
Mosaic-Effect LVT
Mosaic-look LVT prints small tiles, hexagons, or geometric patterns on a larger sheet or tile. It gives you the visual busyness of mosaic without the labor, but it’s a printed image, so it won’t have the same surface texture, joint depth, or feel as real individual mosaic tiles. Treat it as a decorative effect, not a technical substitute for a mosaic shower floor.
Black and White LVT
Black and white works in geometric patterns, monochrome checkerboards, or white marble-look tiles with dark veining. Practical note: dark, smooth surfaces tend to show dust, lint, and water spots more readily, and glossy finishes show wiping marks. Lighter patterned finishes hide everyday dirt better.
Stone, Concrete, and Wood Looks
Light grey stone, beige travertine looks, concrete effects, and warm wood looks all work in bathrooms when the product is bathroom-rated. Wood looks bring warmth but should still be a product rated for wet areas, not a general-purpose plank.
| Design | Appearance | Suits |
|---|---|---|
| Tile effect | Ceramic or porcelain look | Classic and contemporary |
| Checkerboard | Contrasting squares | Traditional, vintage, and modern |
| Mosaic effect | Small decorative patterns | Decorative or retro bathrooms |
| Black and white | High-contrast monochrome | Modern and vintage |
| Stone effect | Natural stone look | Minimalist and spa-style |
| Wood effect | Timber look | Warm, casual, contemporary |
Coordinating With the Rest of the Room
Match the floor’s undertone (warm or cool) to your wall tile, vanity, and fittings. Sample the product in the room’s actual light before buying. Bold floors pair better with plain walls; busy walls usually call for a calmer floor. There’s no universally best color, so choose based on room size, lighting, and how much cleaning you want to do.
How to Choose the Best LVT for a Bathroom
The best LVT for a bathroom is the one the manufacturer explicitly approves for bathroom use, with a wear layer and finish that match your traffic, and an installation method you can carry out correctly.
Bathroom approval. Look for explicit language about bathrooms in the installation guide and warranty. Don’t rely on marketing phrases like “100% waterproof” alone.
Wear layer. The wear layer protects the printed image. A thicker wear layer generally gives more scratch and scuff protection, but thickness alone doesn’t determine overall durability. Core construction, finish, and installation quality matter too. Residential products commonly list wear layers somewhere in the single digits to about 20 mil, with commercial products higher; compare specifications, not just adjectives.
Surface finish. Textured finishes can improve grip and hide wear but can be slightly harder to clean. Smooth finishes wipe clean easily but may feel slick when wet. Ask for published wet slip-resistance data where available. For tile, a dynamic coefficient of friction (DCOF) of 0.42 or higher under ANSI A326.3 is a common benchmark for wet interior floors, and some resilient manufacturers publish comparable results.
Thickness and transitions. Total thickness affects door clearance, threshold height, and how the floor meets adjacent rooms. Check the height against your existing flooring before ordering.
Underfloor heating. Compatibility depends on the product and the heating system. Some manufacturers cap the floor surface temperature (one commonly cited limit is about 81°F, or 27°C), so check the specific documentation and the heating manufacturer’s guidance.
Warranty. Read the exclusions. Bathroom use, standing water, flooding, improper subfloor moisture, and missed installation steps can all limit coverage. Warranty length isn’t the same as life expectancy.
LVT vs. Ceramic and Porcelain Tile
LVT usually costs less and installs faster than ceramic or porcelain tile, and it’s softer and warmer underfoot. Porcelain tile is generally the more durable, longer-lasting choice in wet areas, especially in showers and wet rooms.
| Factor | LVT | Ceramic tile | Porcelain tile |
|---|---|---|---|
| Material | Vinyl-based | Fired clay | Denser fired clay |
| Water resistance | Surface is resistant; joints and edges matter | Surface resistant; grout is the weak point | Very low absorption; grout still needs care |
| Installation | Adhesive or click-lock | Thinset and grout | Thinset and grout |
| Comfort | Softer, warmer | Hard, cold | Hard, cold |
| Cleaning | Simple, no grout on most products | Grout needs cleaning and sealing | Grout needs cleaning and sealing |
| Repair | Individual pieces may be replaceable | Individual tiles replaceable | Individual tiles replaceable |
| Longevity | Product and installation dependent | Product and installation dependent | Product and installation dependent |
Is LVT Cheaper Than Tile?
In most cases, yes. LVT generally costs less to buy and less to install than ceramic or porcelain, mainly because it needs no thinset, grout, or tile cutting equipment. Published installed-cost estimates vary widely by source and region. Commonly quoted ranges for installed LVT run from the low single digits to around $12 per square foot, while ceramic and porcelain are often quoted from roughly $5 to well above $15 per square foot, with large-format, natural stone, and complex layouts costing more. Treat those as rough estimates, not quotes.
Here’s an illustrative example: a 7 ft by 9 ft bathroom is 63 sq ft. At $4 to $12 per sq ft installed, the LVT range would be about $252 to $756 (63 × $4 = $252; 63 × $12 = $756). Actual cost depends on product quality, wear layer, format, adhesive, subfloor repairs, labor, bathroom size, and location. Get local written quotes before budgeting.
Which Is Better for a Bathroom, LVT or Tile?
Choose LVT if you want lower cost, a warmer feel, quicker installation, and low maintenance in a splash-prone bathroom. Choose porcelain tile if you want maximum durability, a floor that can handle showers and prolonged wetness with a proper membrane, and long-term resale appeal. Neither is “best” in every case.
What Is the Best Flooring for a Bathroom?
For general bathroom floors, good options include porcelain tile, ceramic tile, sheet vinyl, and bathroom-rated LVT or rigid-core vinyl. Porcelain and sheet vinyl tend to be the most forgiving around water; LVT offers the best balance of look, comfort, and cost for typical splash zones. Solid hardwood and standard laminate are poor fits in wet areas.
How to Install LVT Flooring in a Bathroom
The exact steps depend on the product, so treat this as a framework and follow the manufacturer’s installation guide wherever it differs.
Step 1: Inspect the Subfloor
Check that the subfloor is structurally sound, clean, dry, and flat. Concrete and approved plywood underlayments are common substrates. Many installation guides call for a flatness tolerance of about 3/16 inch over 10 feet (check your specific guide). For concrete, many manufacturers require moisture testing, such as in-situ relative humidity (ASTM F2170) or calcium chloride testing (ASTM F1869), plus surface pH testing (ASTM F710). Acceptable limits depend on the product and adhesive; some documents cite figures such as 95% RH or 8 lb for certain products, while others set stricter limits. An uneven or damp subfloor is a common cause of failed installations.
Step 2: Remove Existing Flooring Where Necessary
Remove loose, damaged, or unsuitable flooring, old adhesive, and debris. Warning: older resilient flooring, adhesives, and backing materials in older homes can contain asbestos. Don’t sand, scrape, or break up suspect material. Have it tested and handled by qualified professionals.
Step 3: Repair and Level the Subfloor
Fill cracks and low spots with a compatible patching or smoothing compound, follow its drying time, and recheck flatness against the manufacturer’s tolerance. Remove ridges and high spots before flooring goes down.
Step 4: Measure the Bathroom
Floor area = length × width. For an irregular bathroom, break the floor into rectangles and add them together. For example, a main area of 8 ft × 5 ft = 40 sq ft plus an alcove of 3 ft × 2 ft = 6 sq ft gives 46 sq ft. Use the same units throughout.
Room area isn’t the same as the amount to buy. Add waste for cuts, usually about 10% for straight layouts and more for diagonal, checkerboard, or patterned layouts (often 10% to 15% or higher; confirm with your installer). Example: a 63 sq ft bathroom plus 10% is 69.3 sq ft; with 24 sq ft boxes, 69.3 ÷ 24 = 2.89, so buy 3 boxes (72 sq ft).
Step 5: Acclimate the Flooring
Follow the manufacturer’s instructions. Some products require time in the room at a set temperature range before installation; others don’t. Don’t assume a universal period.
Step 6: Plan the Layout
Find the room’s reference line, usually from the center or the most visible wall. Dry-lay a few rows where appropriate, avoid thin slivers along visible edges, and align patterns. For checkerboard and tile-effect layouts, check that the pattern lines up from the doorway.
Step 7: Cut Around Fixtures
Measure carefully around the toilet flange, pedestal base, vanity, tub edge, door casing, and pipes. Make paper templates for complicated cuts. Don’t trap a floating floor under fixed objects unless the instructions allow it, because floating floors need room to move.
Step 8: Install the LVT
Glue-down: Spread the approved adhesive with the specified trowel, respect its open and working times, lay tiles in the specified sequence, and roll the floor where required. Observe curing time before heavy use or wet cleaning.
Click-lock: Maintain the required expansion gap, fit rows in the specified order and angle, and avoid damaging the locking edges. Follow any bathroom-specific perimeter or joint requirements.
Don’t mix these methods. Each has its own rules.
Step 9: Seal Edges and Finish Details
Finish perimeter gaps, pipe penetrations, bath and shower junctions, and doorway transitions with manufacturer-approved trim and sealant. Some manufacturer instructions advise filling expansion spaces around wet areas. Sealant at the edge helps limit water entry but isn’t a substitute for a properly designed waterproofing system.
Step 10: Final Inspection
Look for lifted edges, open joints, uneven spots, damaged locks, and poorly finished edges. Keep foot traffic and water off the floor for the time the manufacturer specifies.
Waterproof LVT in Bathrooms and Wet Rooms
Waterproof LVT is suitable for most bathroom floors outside the direct shower area, but it shouldn’t be treated as a shower floor unless the manufacturer and a compatible waterproofing system say it can.
Water can reach a subfloor through joints, perimeter gaps, pipe openings, and leaks at the tub or toilet. Around showers and baths, the risk of constant moisture is higher, which is why showers and wet rooms normally rely on a membrane or a sloped, waterproofed base rather than ordinary flooring alone.
Some manufacturers do offer LVT systems designed for wet areas. For example, Mapei markets a shower system for LVT that’s intended to allow luxury vinyl tile in showers and tub surrounds, using specific membranes and adhesives. These are engineered systems, not something to improvise with a standard floor.
How to Clean and Maintain LVT Bathroom Flooring
LVT is among the easier bathroom floors to keep clean, mainly because it has no grout on the surface. A simple routine is enough:
- Sweep or vacuum (without a beater bar) to remove grit that can scratch the surface.
- Damp mop with a manufacturer-approved, pH-neutral cleaner.
- Rinse away soap residue, which can leave a film and make the floor slippery.
- Wipe up water promptly and avoid leaving puddles around the tub and toilet.
- Avoid abrasive pads, harsh solvents, wax, and polishes unless the manufacturer permits them. Many manufacturers also advise against steam mops.
- Use non-staining rugs; some rubber backings can discolor vinyl.
- Periodically check perimeter seals and joints and reseal if they crack or lift.
Textured finishes may need a soft brush to clear residue from the texture; smooth finishes show streaks more readily.
Advantages and Disadvantages of LVT Bathroom Flooring
| Advantages | Disadvantages |
|---|---|
| Wide range of looks, including stone and tile effects | Not every LVT is approved for bathrooms |
| Softer and warmer than ceramic or porcelain | Water can get under poorly sealed joints and edges |
| Simple cleaning and no surface grout | Subfloor preparation is critical |
| Often faster and cheaper to install than tile | Heat, sharp objects, and heavy point loads can damage it |
| Individual pieces may be replaceable | Repairs may not match perfectly on older floors |
| Good water resistance when the right product is installed correctly | Low-quality products may wear faster |
Common LVT Bathroom Flooring Mistakes
- Not checking bathroom approval. Result: voided warranty or early failure. Check the guide first.
- Treating “waterproof” as a guarantee for the whole floor. Result: hidden moisture damage. Detail edges and penetrations properly.
- Skipping moisture testing. Result: adhesive failure, mold, or lifting. Test and record results.
- Installing over an uneven subfloor. Result: visible bumps and weak joints. Level to tolerance.
- Using the wrong adhesive or trowel. Result: poor bond. Use what the manufacturer specifies.
- Poor layout planning. Result: slivers, crooked patterns. Dry-lay and plan from the room’s center.
- Sloppy cuts around the toilet and pipes. Result: gaps where water can enter. Use templates and trim carefully.
- Using the wrong sealant. Result: failed seals or staining. Use manufacturer-approved products.
- Ignoring expansion requirements on floating floors. Result: buckling or gapping. Leave the specified gaps.
- Using ordinary LVT in a wet room without an approved system. Result: leaks and rot. Use a designed system.
Frequently Asked Questions
Do people use LVT in bathrooms? Yes. LVT is widely used on bathroom floors, especially in homes where cost, comfort, and low maintenance matter. It’s most commonly installed outside the direct shower area.
What is the best LVT flooring for a bathroom? The best choice is a bathroom-approved product with a durable wear layer, a finish that gives reasonable grip, and a construction that suits your subfloor. Verify approval in the installation guide.
Which flooring is 100% waterproof? No installed floor is guaranteed waterproof in every condition. Porcelain tile and vinyl materials resist water well, but grout, seams, and perimeter gaps can still let water through. A waterproofing membrane is what protects the subfloor.
What is the most durable material for a bathroom floor? Porcelain tile is generally considered the most durable option for wet areas when properly installed. LVT is a durable, comfortable alternative for splash zones.
What is the longest-lasting type of flooring? Properly installed ceramic, porcelain, and natural stone tile are among the longest-lasting floor types. Lifespan depends heavily on product quality, installation, and maintenance.
What is the new trend for bathroom floors? Large-format stone looks, checkerboard patterns, and warm neutral tones are common choices in current bathroom design, though personal taste and room size should drive the decision.
What is the easiest bathroom floor to keep clean? Large-format tile with narrow grout lines, sheet vinyl, and LVT are all easy to clean. LVT and sheet vinyl avoid most grout maintenance.
Can LVT be installed around a toilet? Yes. Cut carefully around the flange or base, and seal or trim the edge as the manufacturer directs. For floating floors, follow instructions on whether the toilet may sit on or beside the floor.
Can you put LVT over existing tile? Sometimes, but only if the manufacturer allows it and the tile surface is flat, clean, and sound. Deep grout lines often need to be filled and leveled first.
Conclusion
LVT bathroom flooring is a practical, good-looking choice for many homes, offering comfort, easy cleaning, and a wide range of tile and stone looks at a typically lower cost than tile. Its success depends less on the label and more on three decisions: choosing a product approved for bathroom use, preparing a flat and dry subfloor, and sealing edges and penetrations according to the manufacturer’s instructions. Keep LVT out of unprotected shower areas, and before buying, read the installation guide and warranty for the exact product.